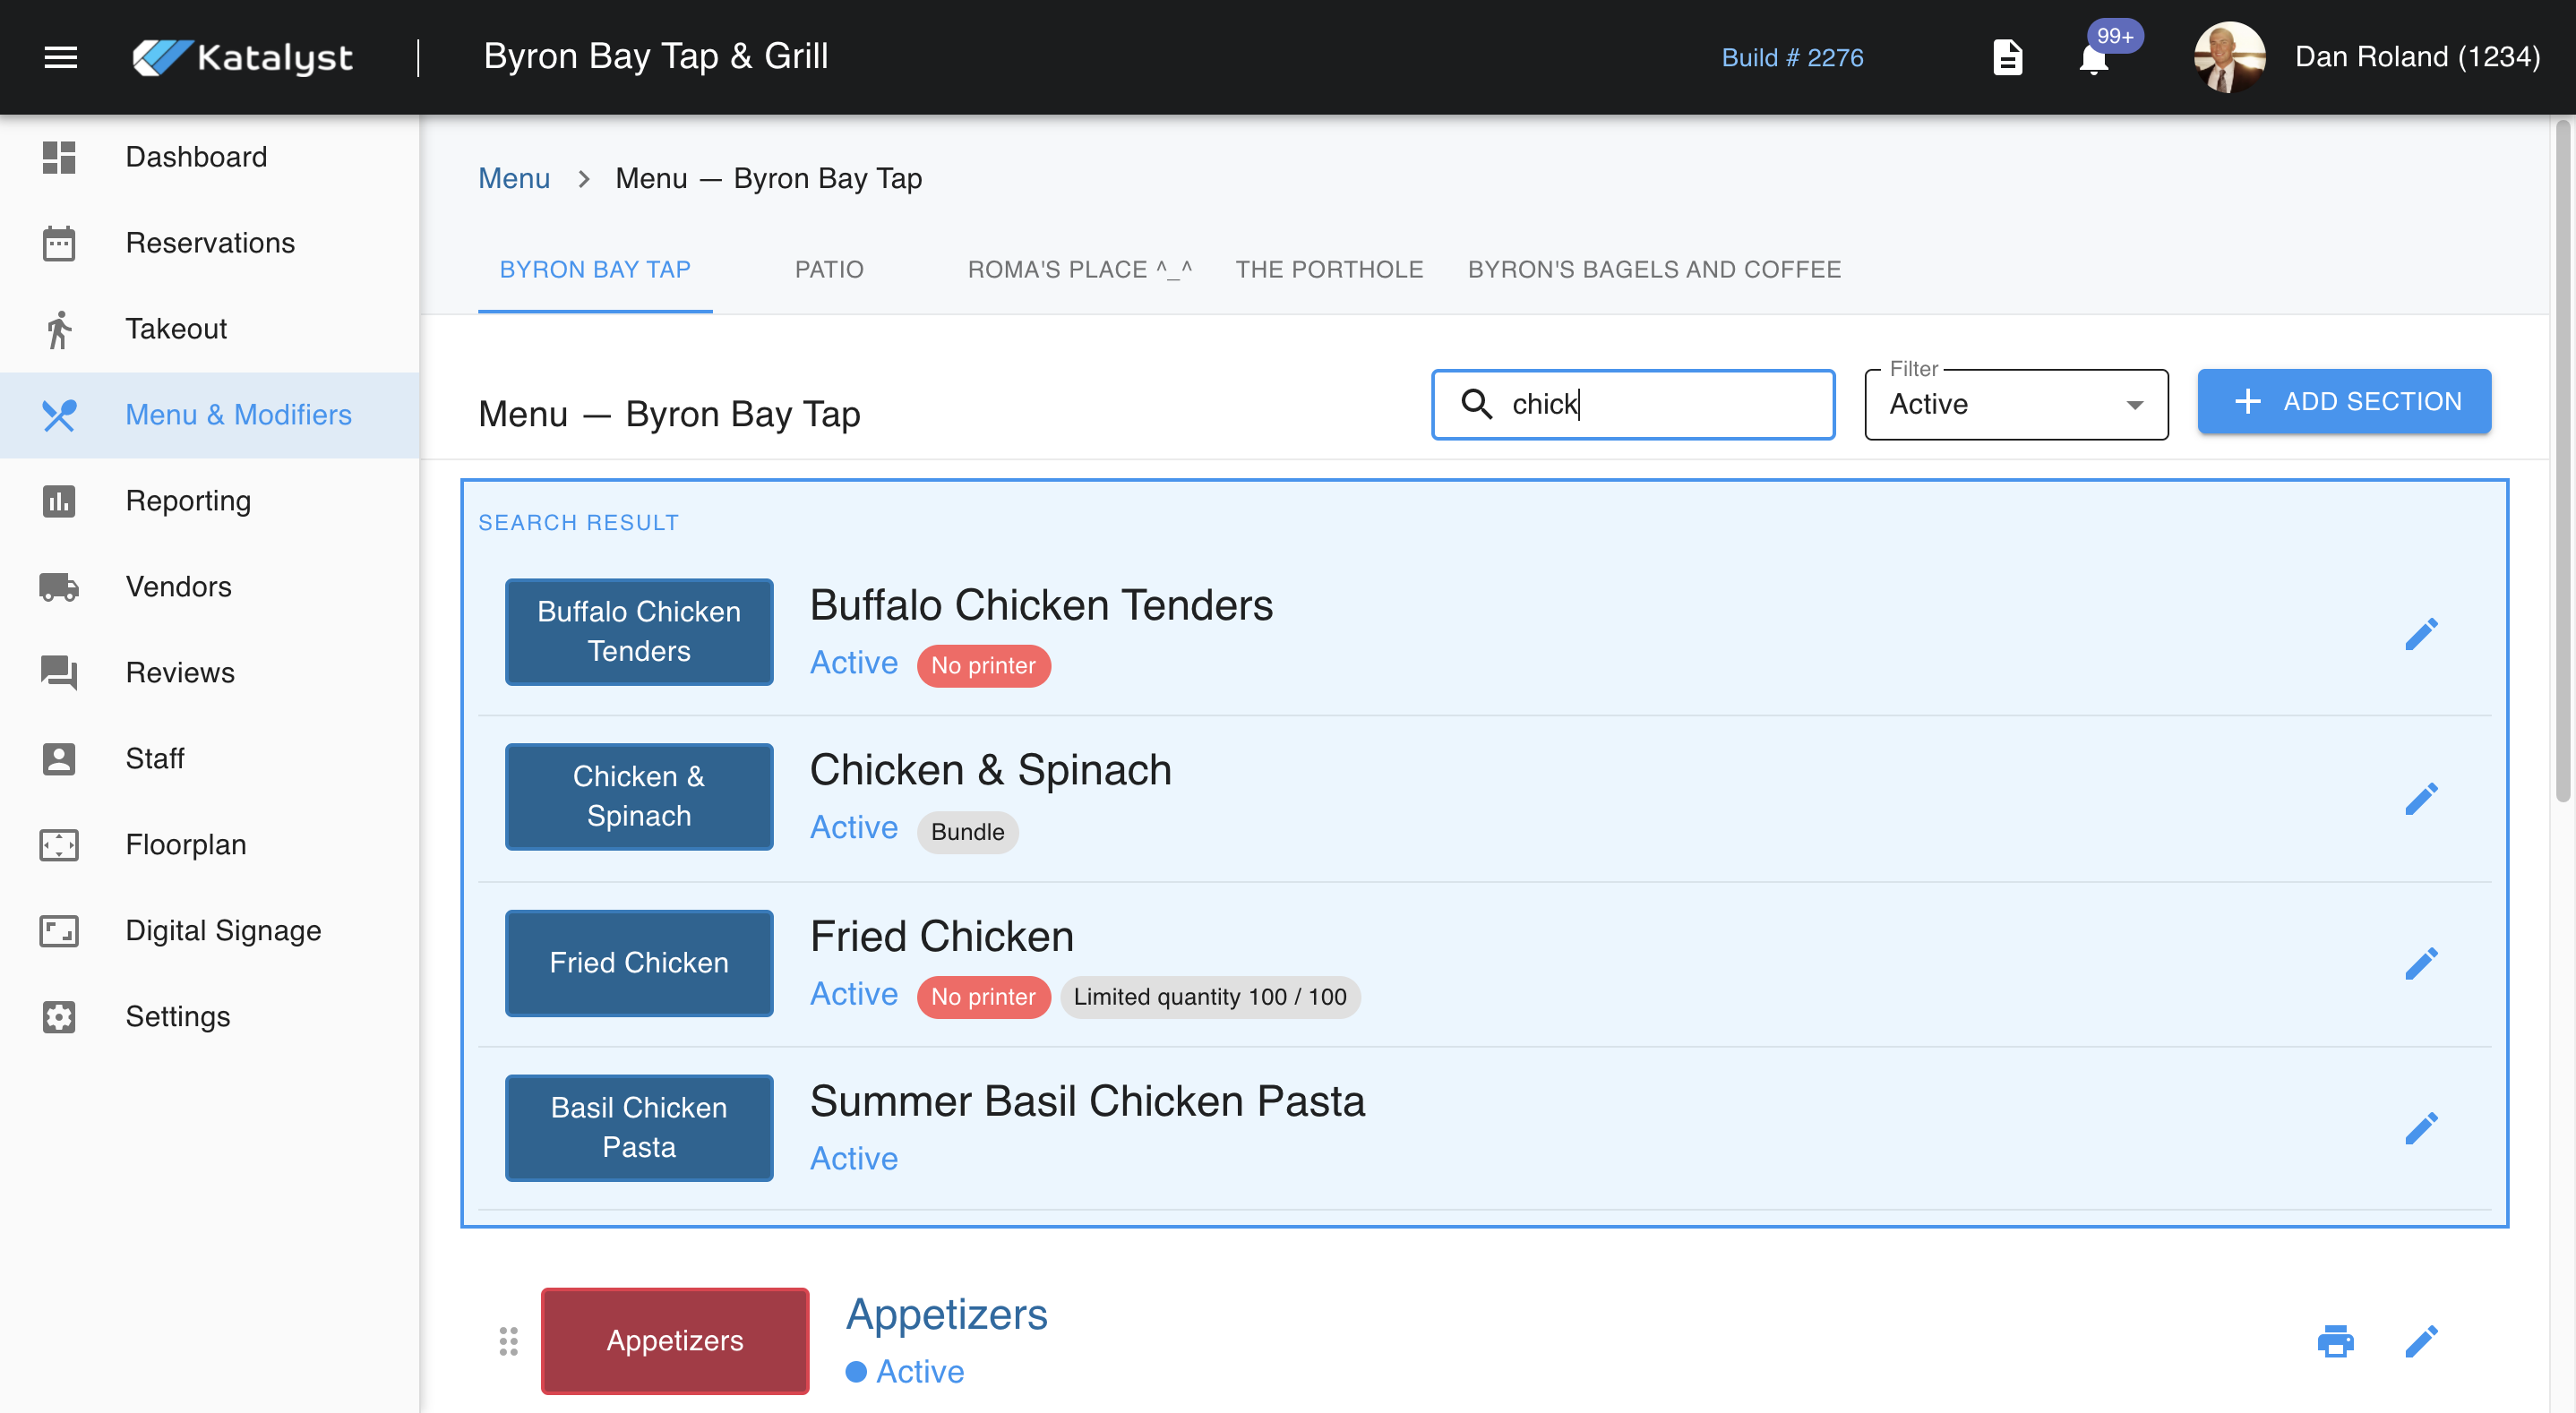
From menu sections, you can manage all aspects of your menu items. Listed across the top are all revenue centers.

Under the bar that list's the revenue centers, there is a quick reference search bar. You can begin to type out chick and it will populate all items that match. All items that will show up when searched are active menu items only.
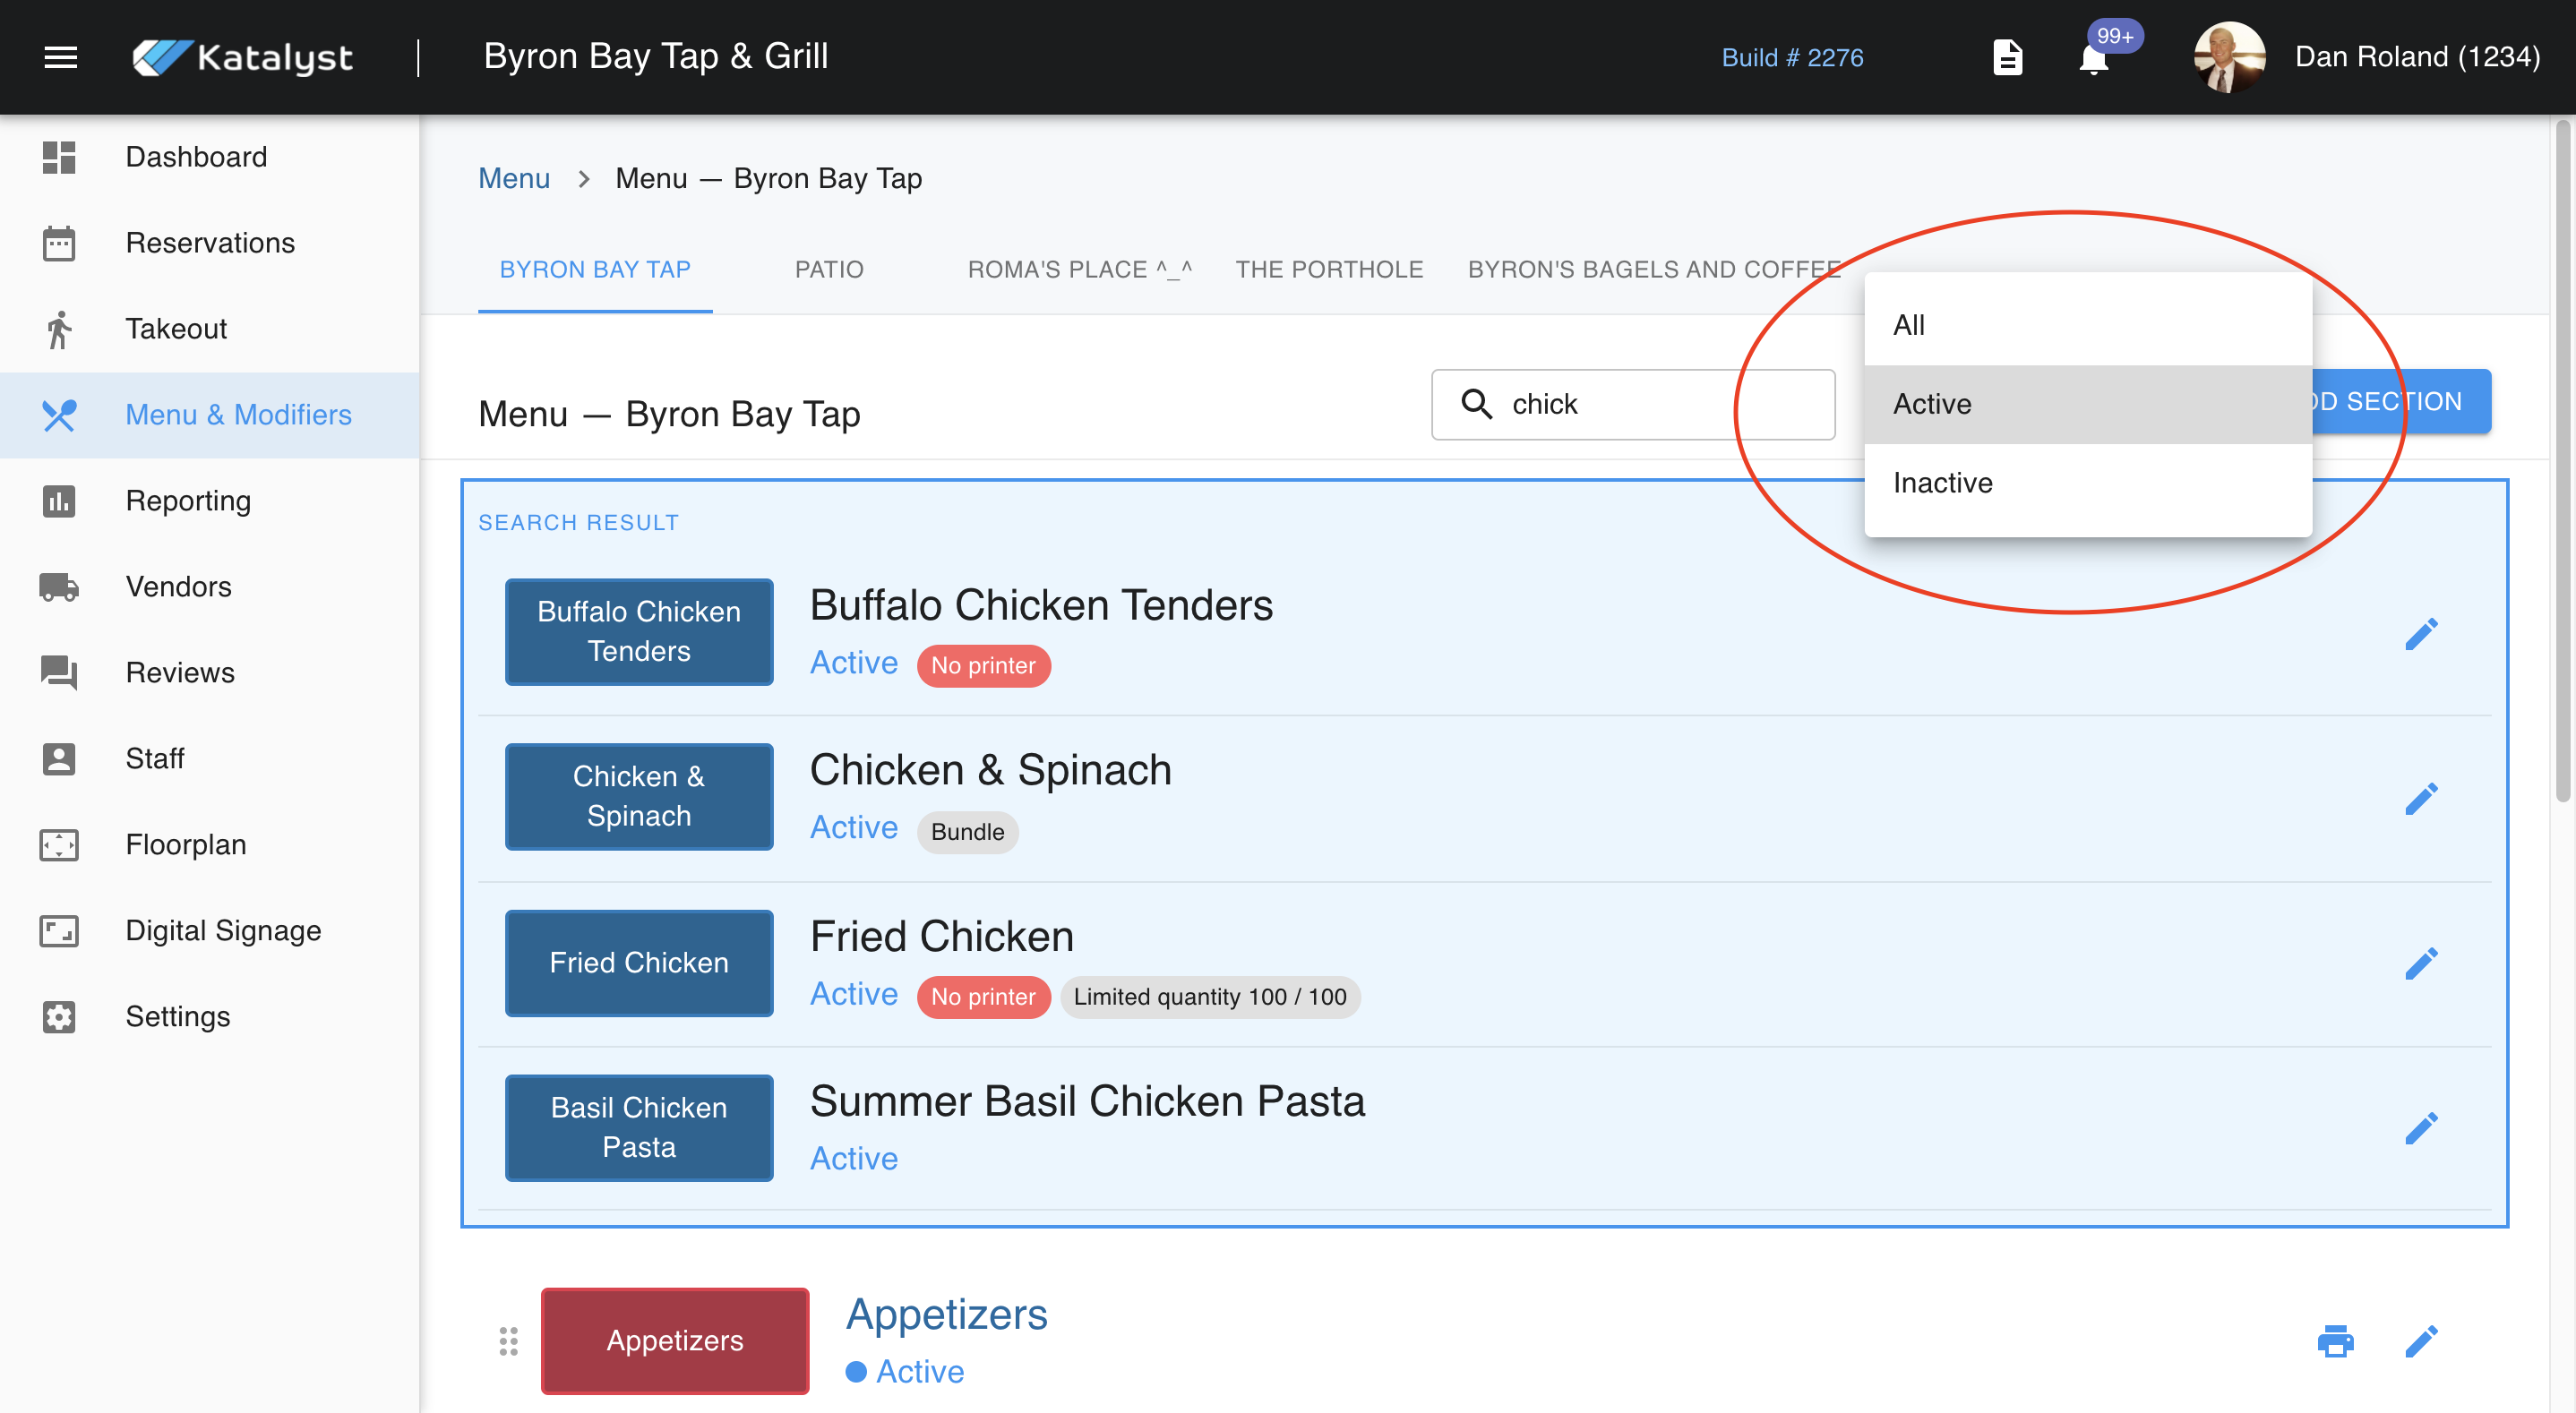
Should the item be inactive, you will need to use the drop-down menu to the right of your search button. If you are working to make a small change to the menu, you should identify early if you are working on an item that is already active.
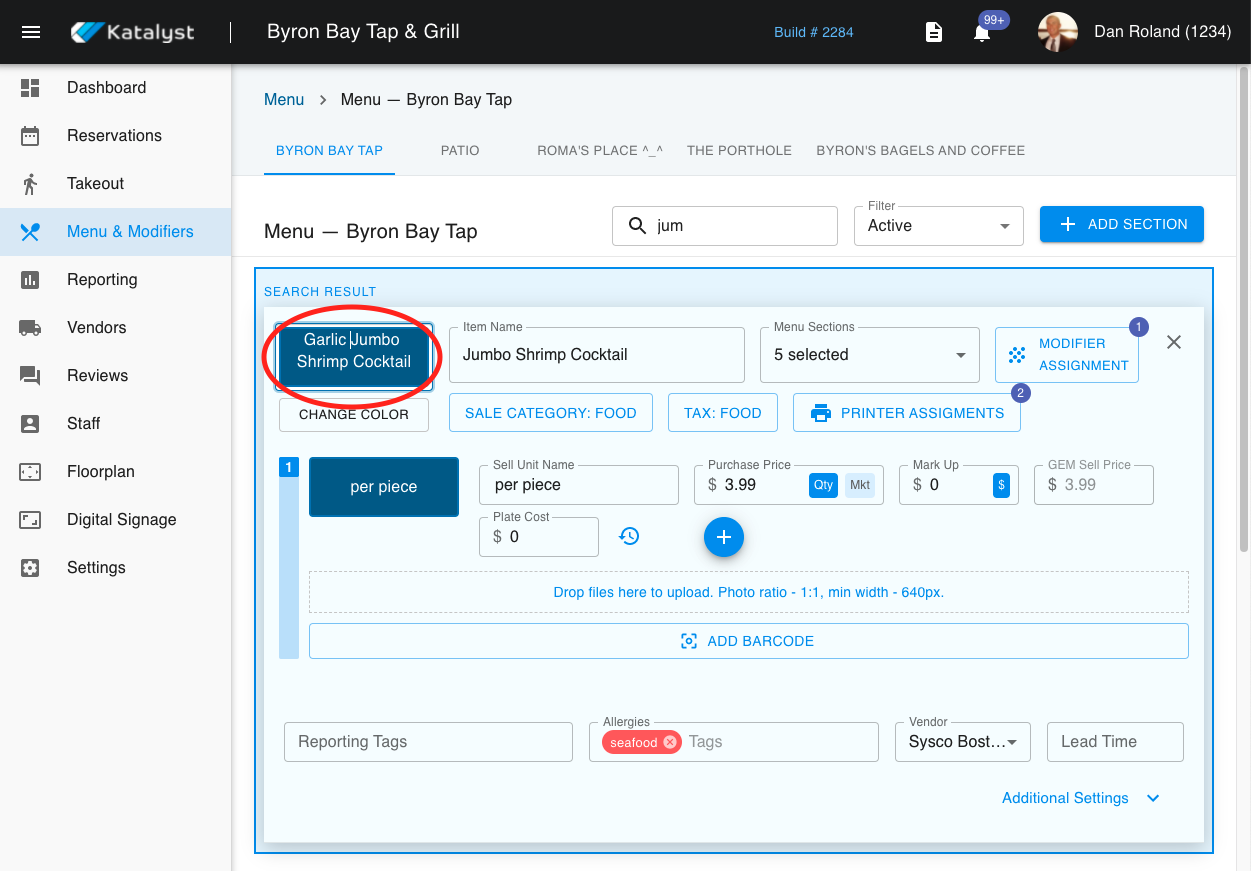
When you have established which menu item needs to be adjusted, click on it. You can either click the item bar or the edit pencil - both will work the same. From here, you are able to make basic edits like changing the color of the button.
Note: This coloring will reflect in the POS.
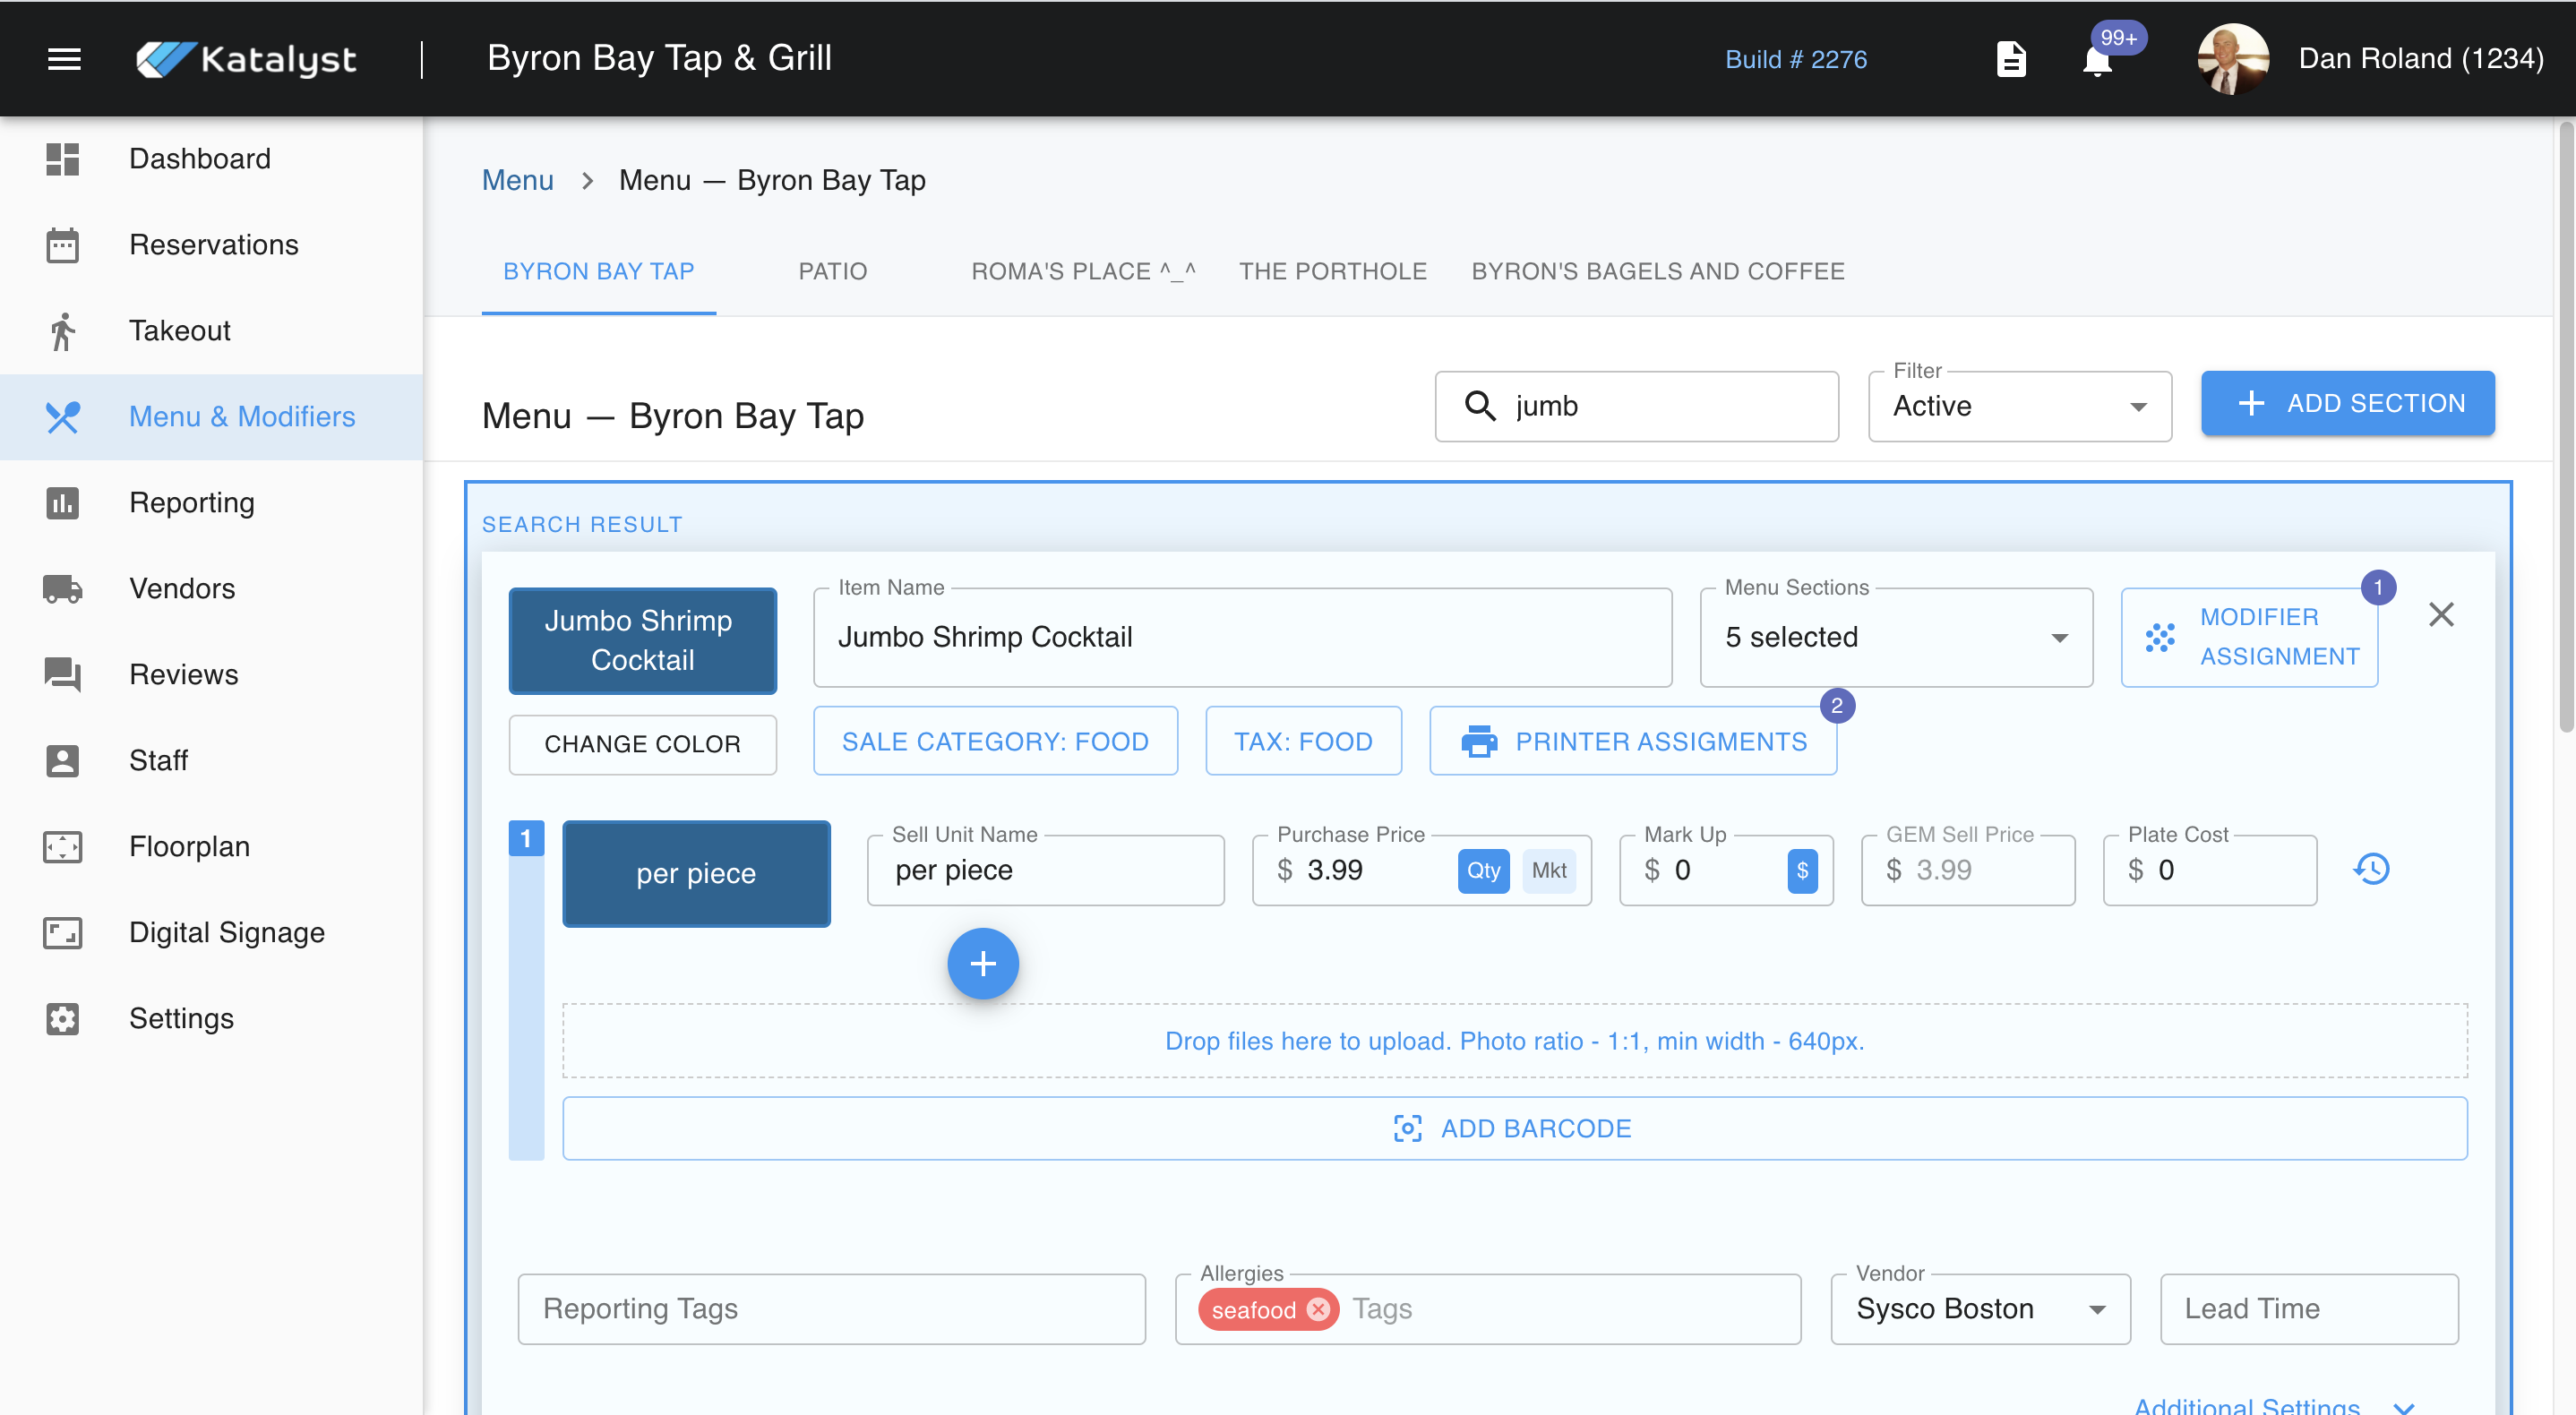
You can also edit the name of the item being worked on in four different places. Each of these places will reflect in different places. Editing in one spot will not change it in the other three.
The first place you can edit the name of an item is with-in the module button. This will make the name change in the POS only.
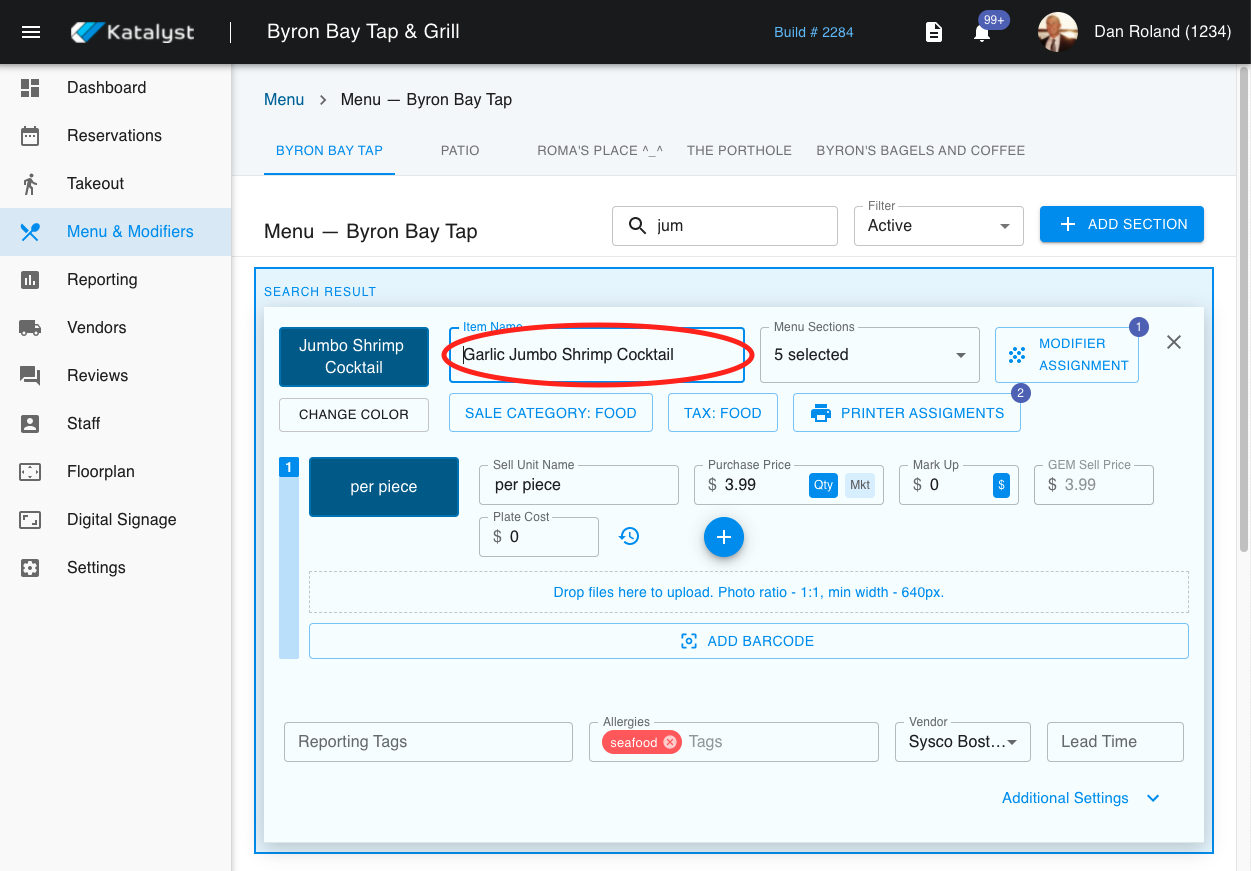
The second-place you edit an item's name is within-in Item Name to the right of the module. This edit will reflect in your reporting.
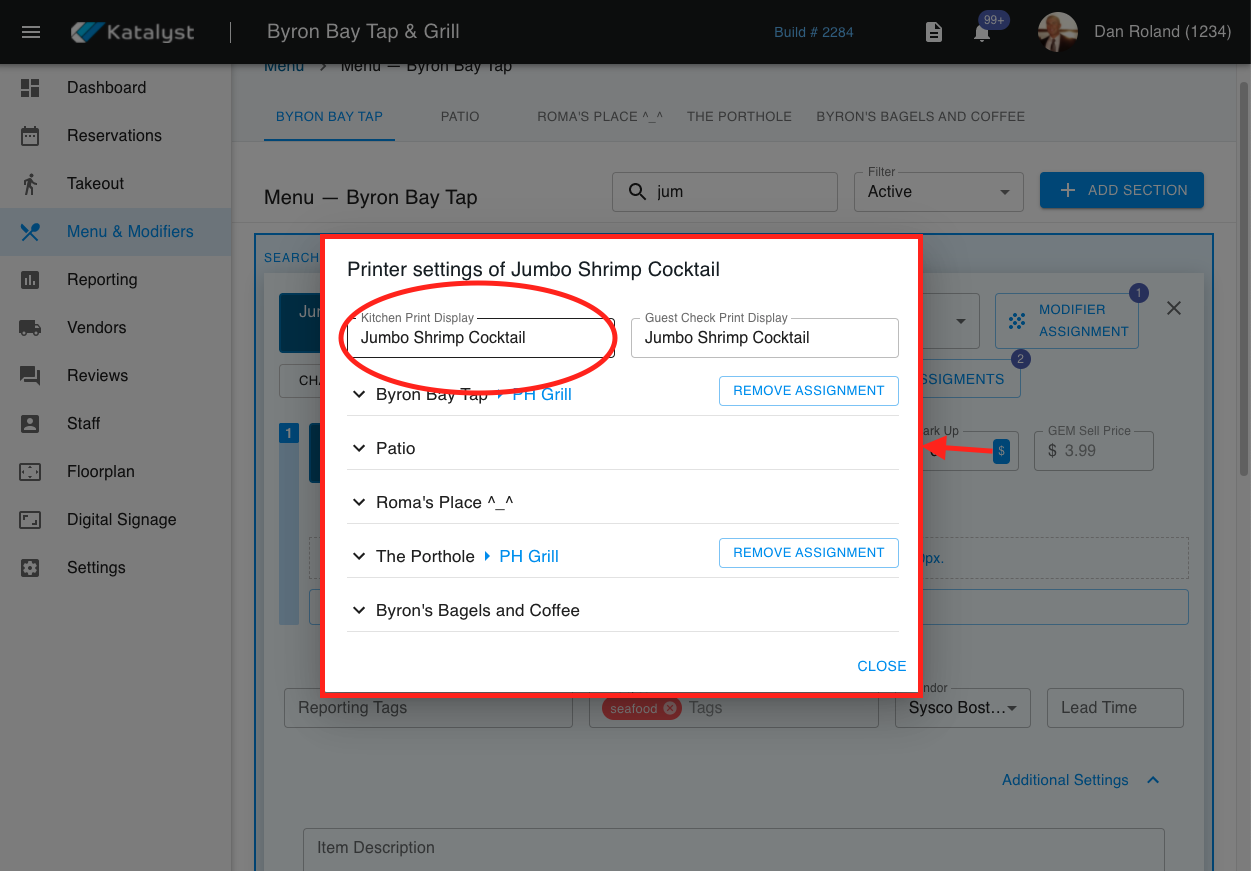
The third place to make edits to the name is within Printer Assignments. When you click into printer assignments, a pop-up will appear. Editing the Kitchen Print Display will change what comes to the kitchen printer. It will not appear on the POS server-side or on anything guest-facing.
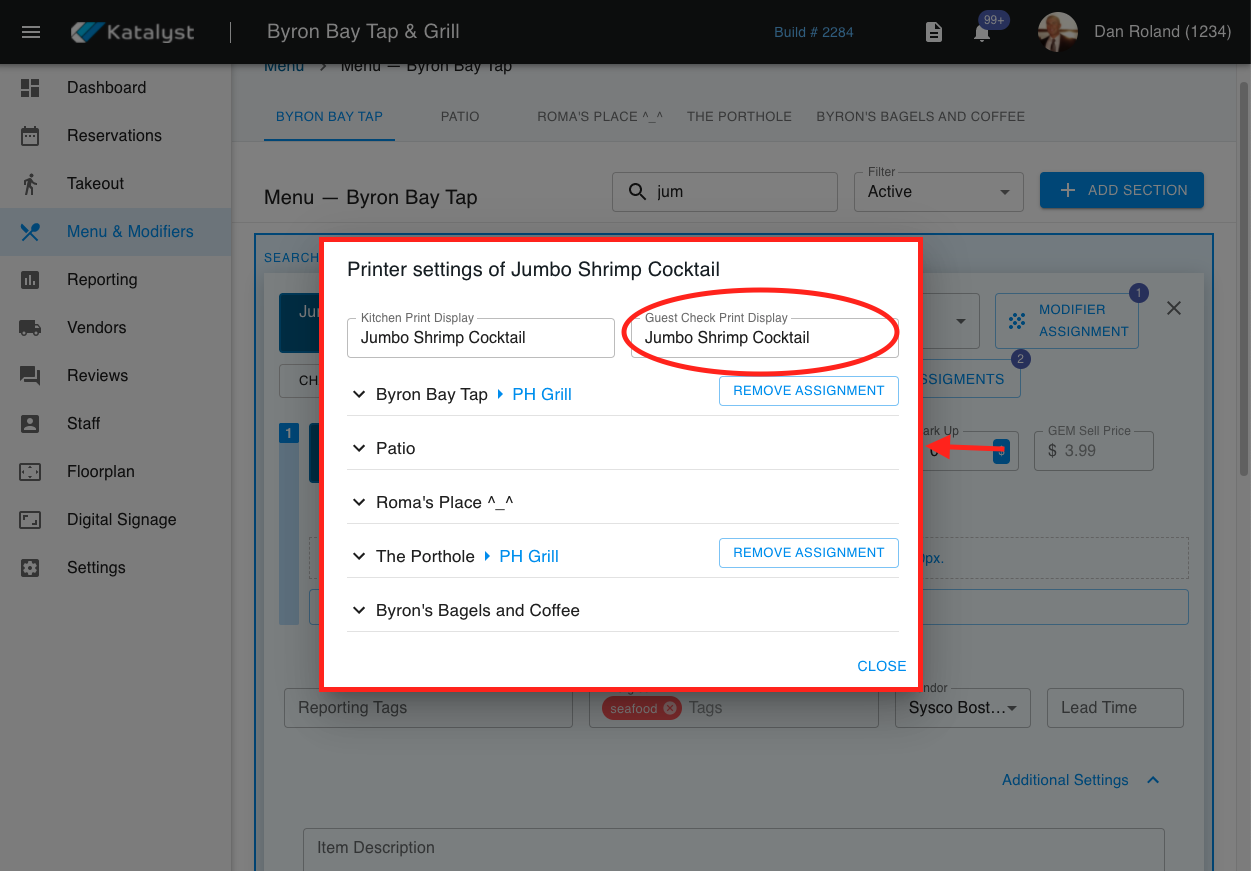
To the right of the Kitchen Print Display name is the Guest Check Print Display. This will allow you to edit what will be present on the guest check.
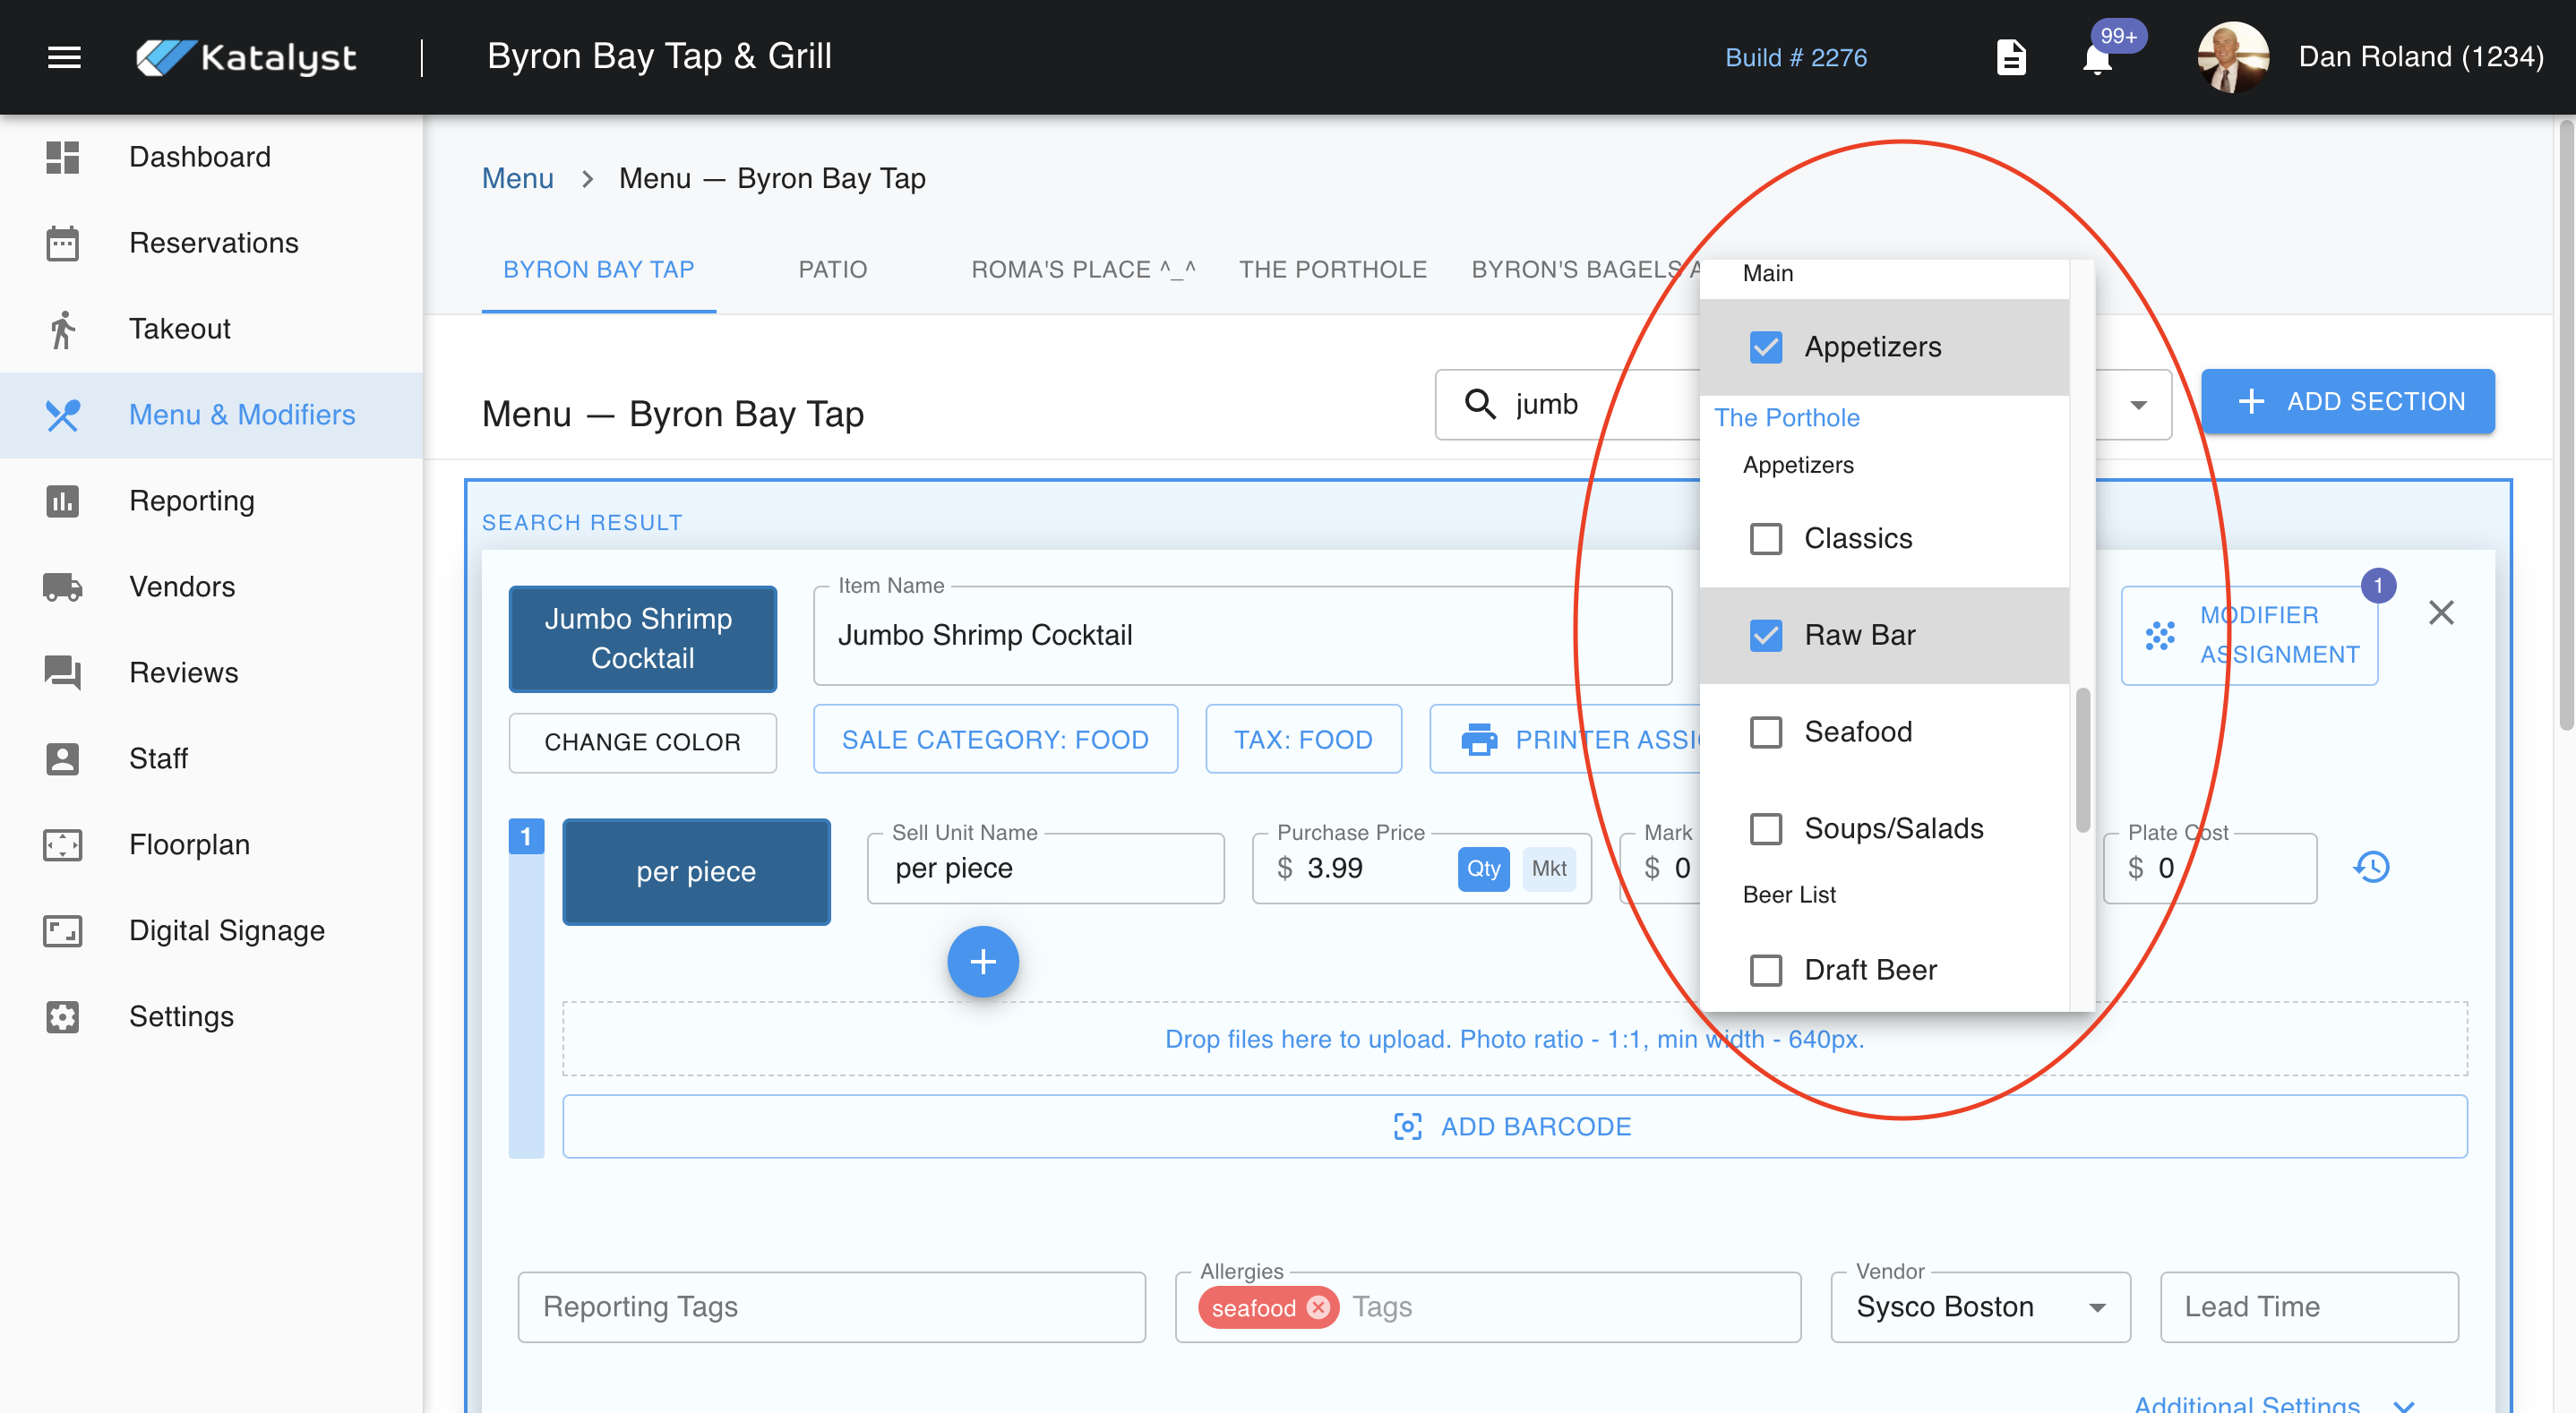
From this area, you can also edit menu sections that item will show in. For example, maybe you want the Jumbo Shrimp to show in Appetizers as well as the Raw bar. You would just check off both boxes. The system will autosave changes on existing menu items. If you are creating a new menu item, you must save it manually.
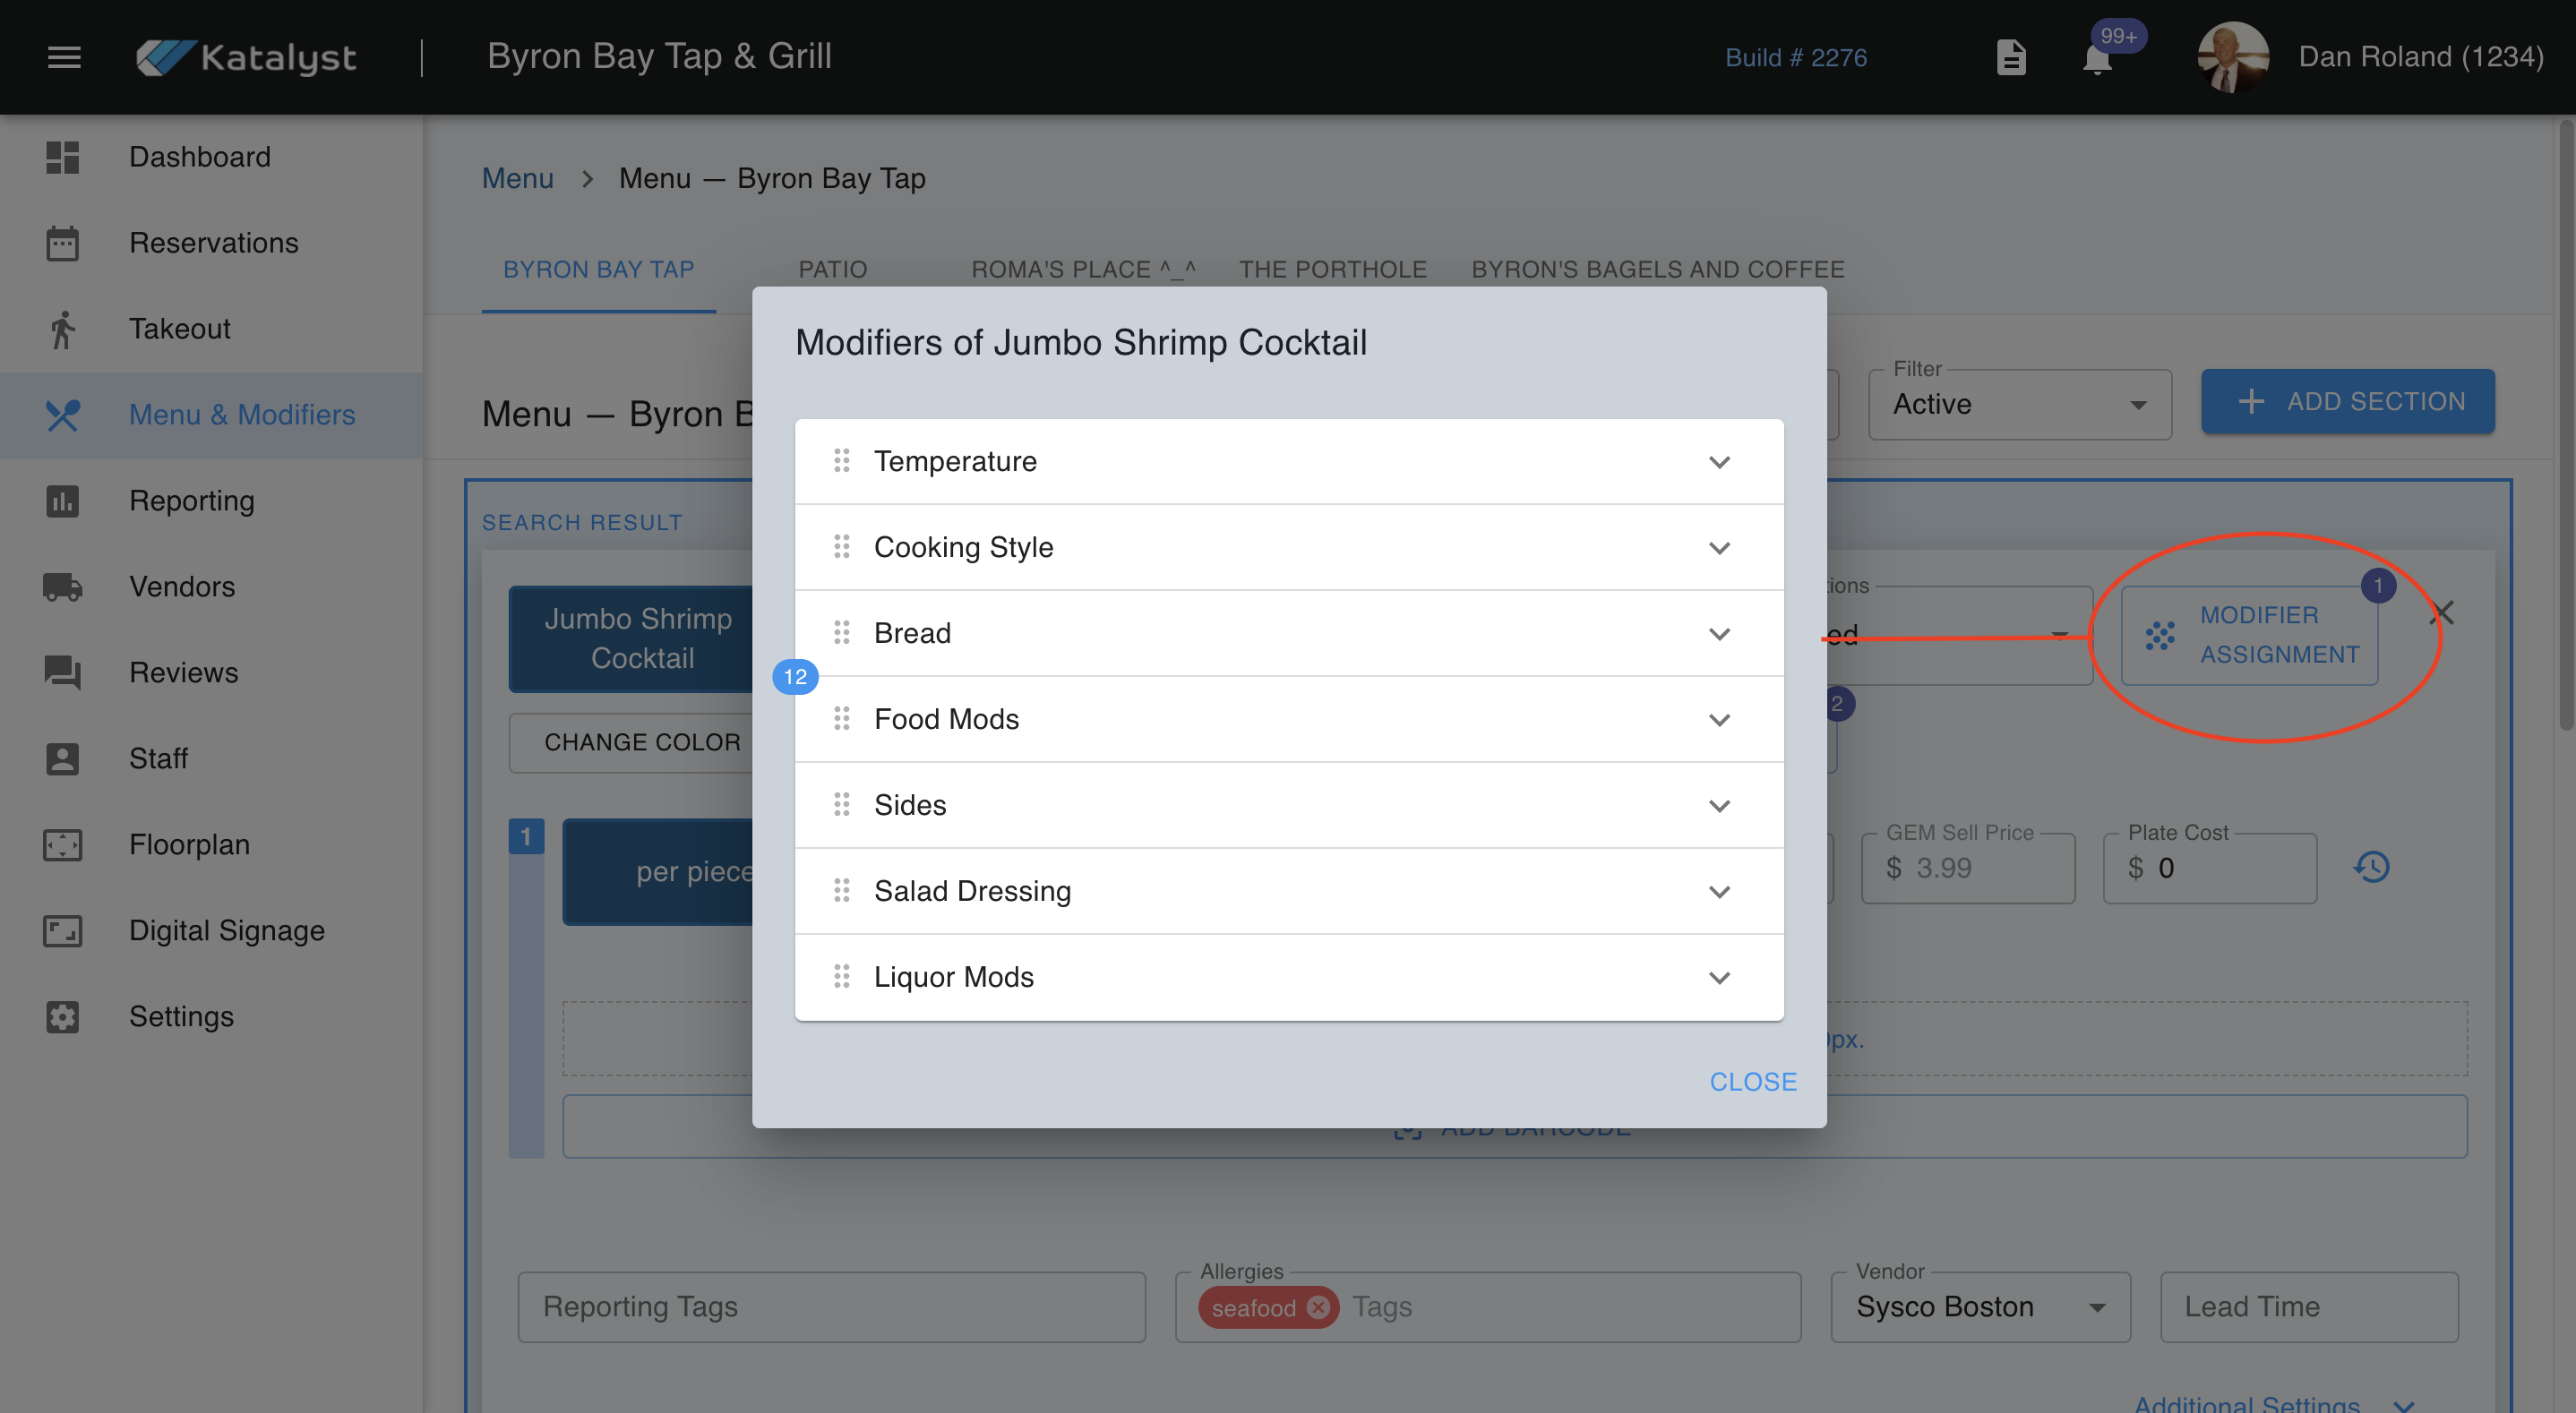
To the left of the menu sections, is the menu modifier assignment where you are able to apply modifiers to the menu item you are on. If a modifier is active in the item you are working on, it will show a number in a little blue bubble. Each modifier category will have a drop-down menu where you can add or take away modifiers as you see fit. Any modification made within a menu item will reflect in any menu category the menu section is in.
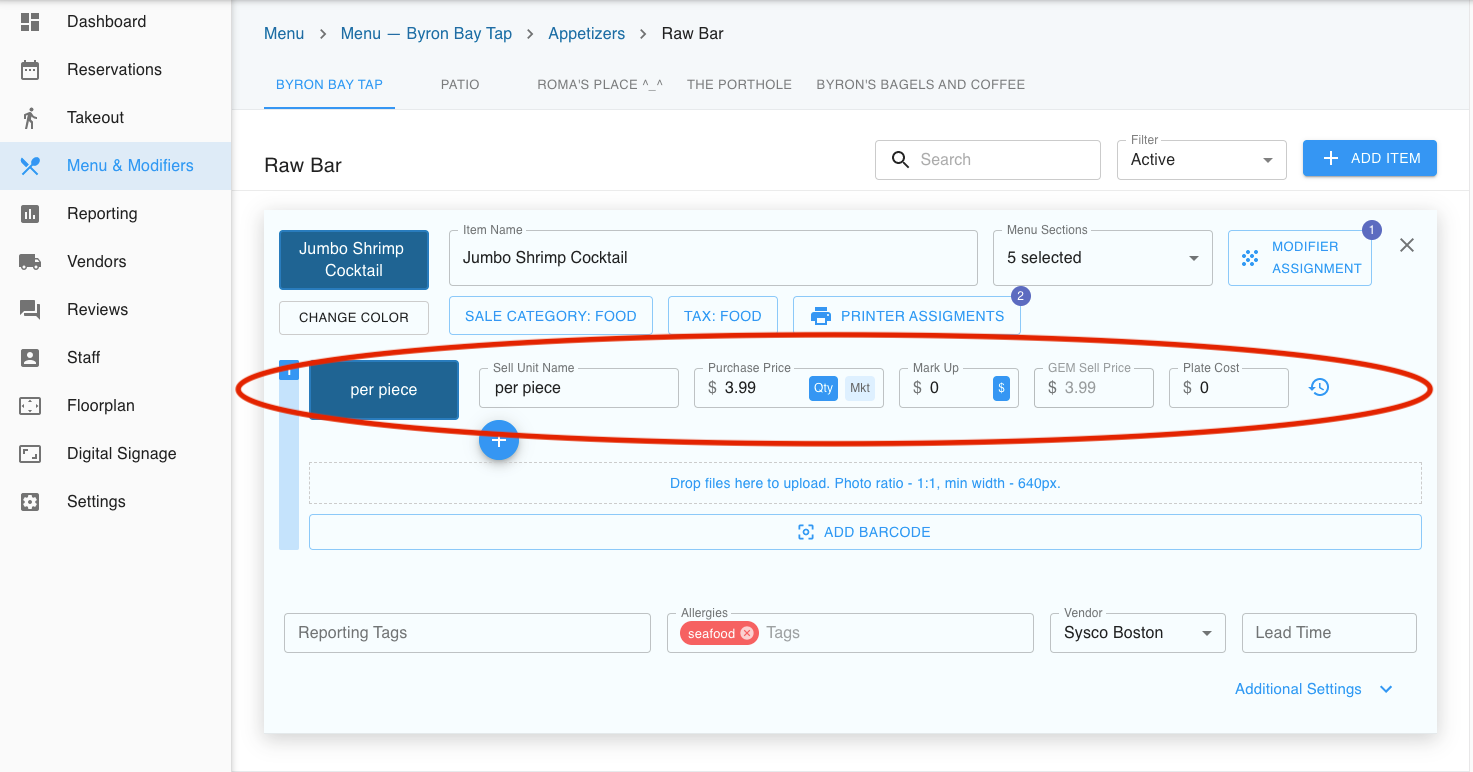
The section below is where we are able to price out the item. Pricing is done per item. This is where you list your purchase price, markup, and GEM sell price. You may choose to simplify this process if you do not wish to add markup value. You may enter the total price in the purchase price and not enter the markup value, which will leave the GEM matching the purchase price.
Below pricing, is where you're able to add photos and barcodes. Barcodes are used more for establishments that offer retail.
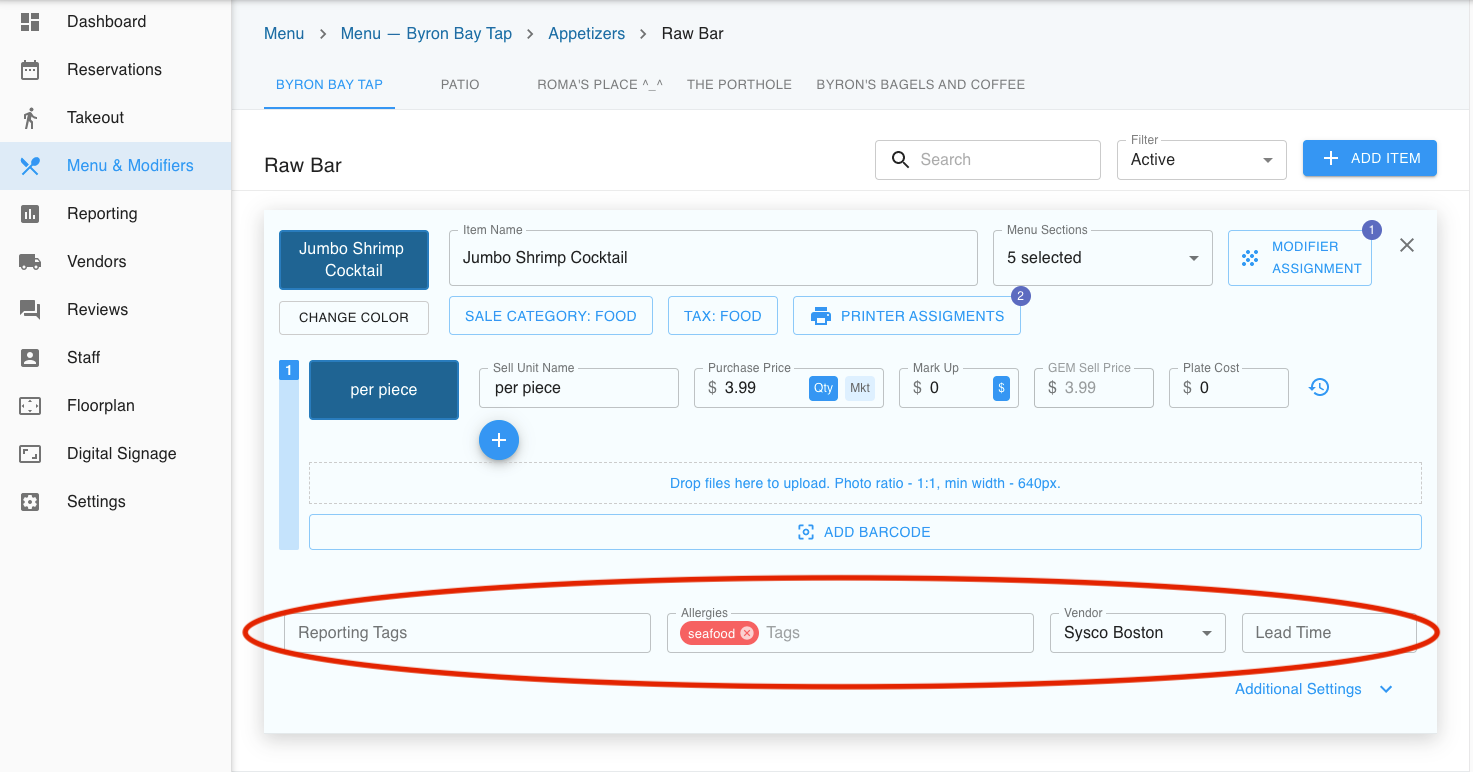
Lastly, below is where you're able to add tags to the product, keep track of vendor sources, and note the lead time the product should take to prepare in the kitchen.
Tags within this space are customizable. These tags allow you to lump multiple menu items together, helping you to track in a more efficient way.
Allergy tags will show up on online ordering. These tags are pre-made for you with onboarding, but can be customized further.
The vendor source helps you to track which vendor gets you which products. If you would like to add a lead time to the item, this will help you plan in advance. This lead time is associated with a vendor who may require a certain amount of notice prior to delivery. This lets you know how long in advance you need to order products from a vendor. This time will also reflect in online ordering.
Example: If you offer a birthday cake, but you need at least two days to order from the bakery in which supplies this cake, a customer who wants to order it would not be able to order in less time than indicated in this slot. This does reflect in online ordering. Note that this lead time has nothing to do with the kitchen.
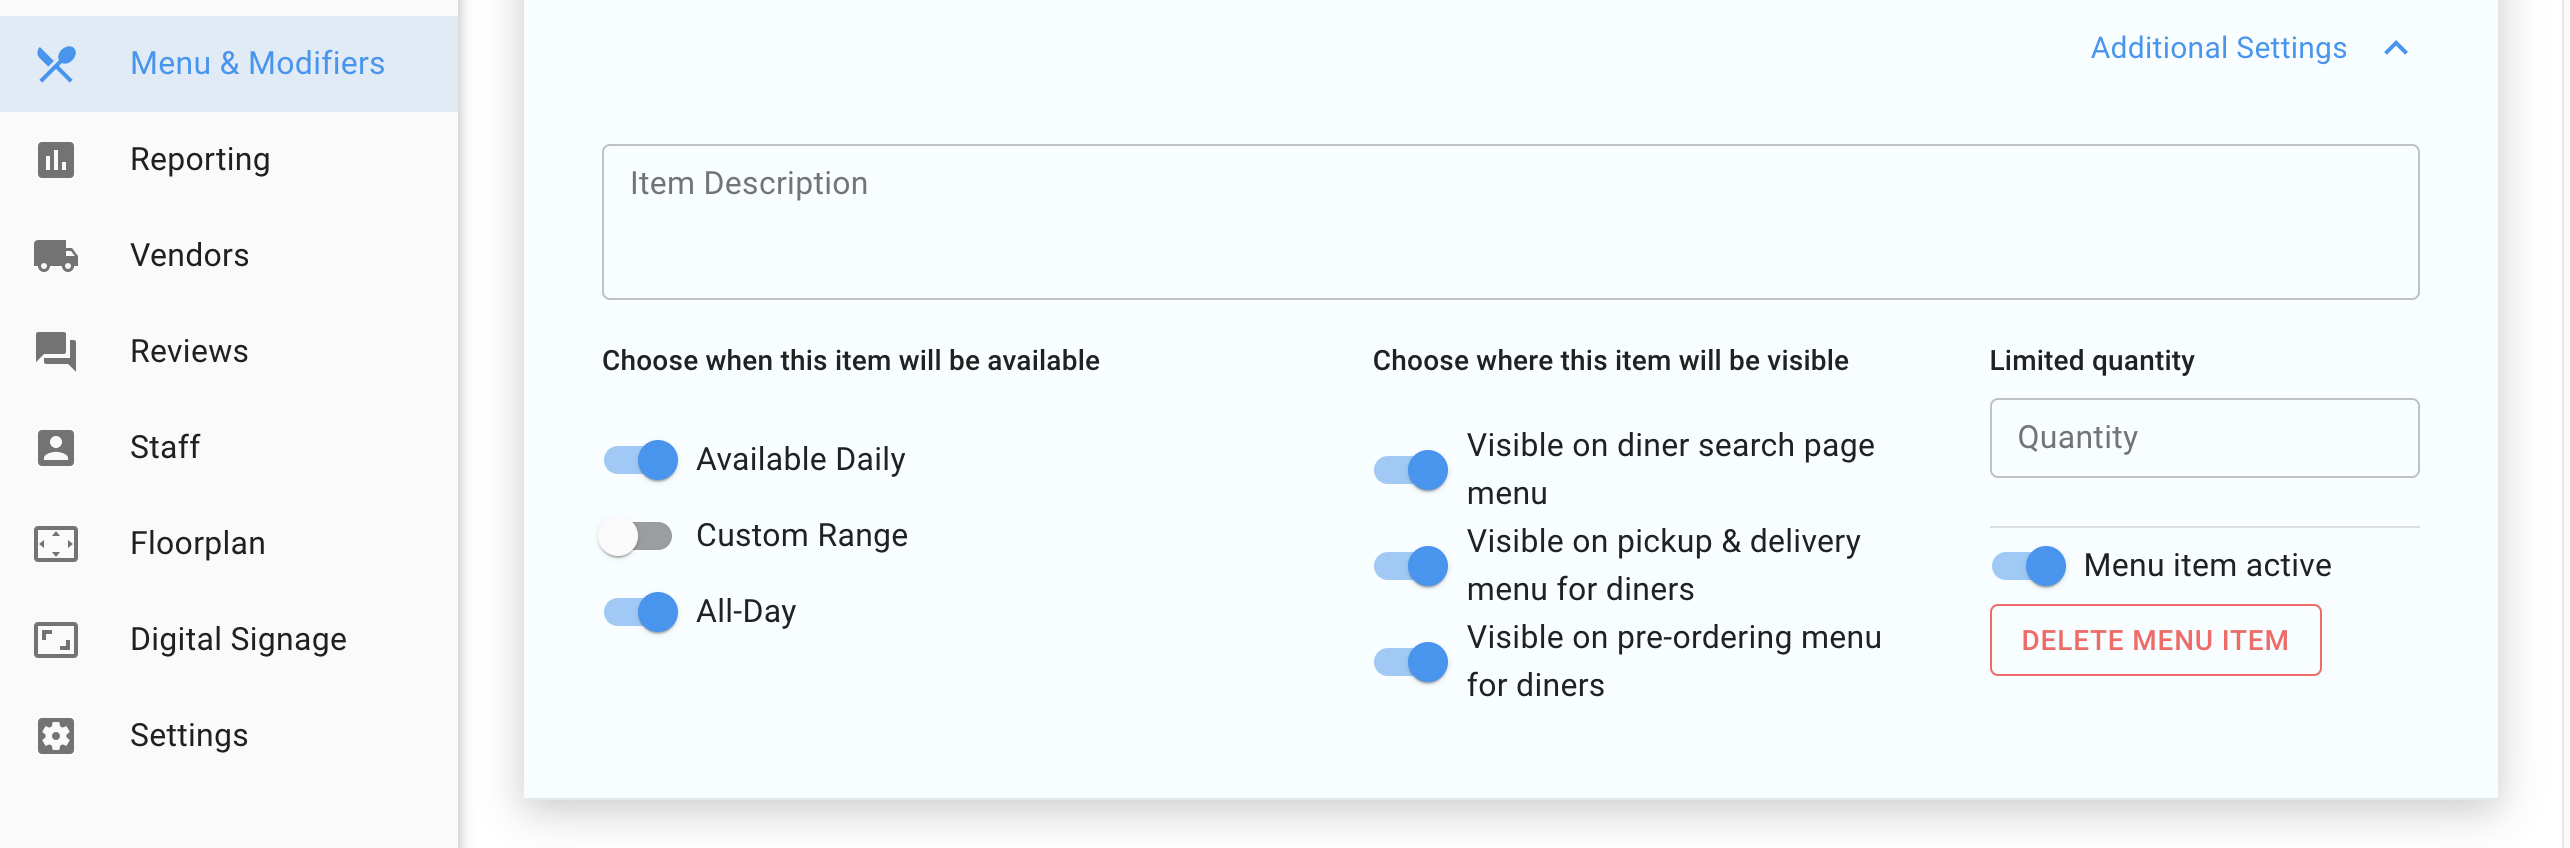
If we click into additional Settings, we will be shown a section where we can add an item description of the menu item, as well as access to a couple of different toggles. The first toggle shows when the item will be available. Usually, the item should be available and toggled on for *All-day and *Available Daily.
However, if you wish to set it for a custom range, say it is a special only given on Tuesdays, we can accommodate this. To the right of this toggle menu will be where we can control where this menu item will display. Depending on how you're set up will depend on how these toggles are used.
To the very right of both of the toggle option section is where we can edit the quantity available, where we are able to make a menu item active/inactive, or totally delete this menu item. If you do want to delete the menu item, it will completely delete. If it is a seasonal item or an item that you may want to use again, we recommend you make it inactive so you do not have to recreate the item.