This section is where you can control your onsite floor-plan. In most cases, Onboarding will have built the floor-plan out during training and set-up.
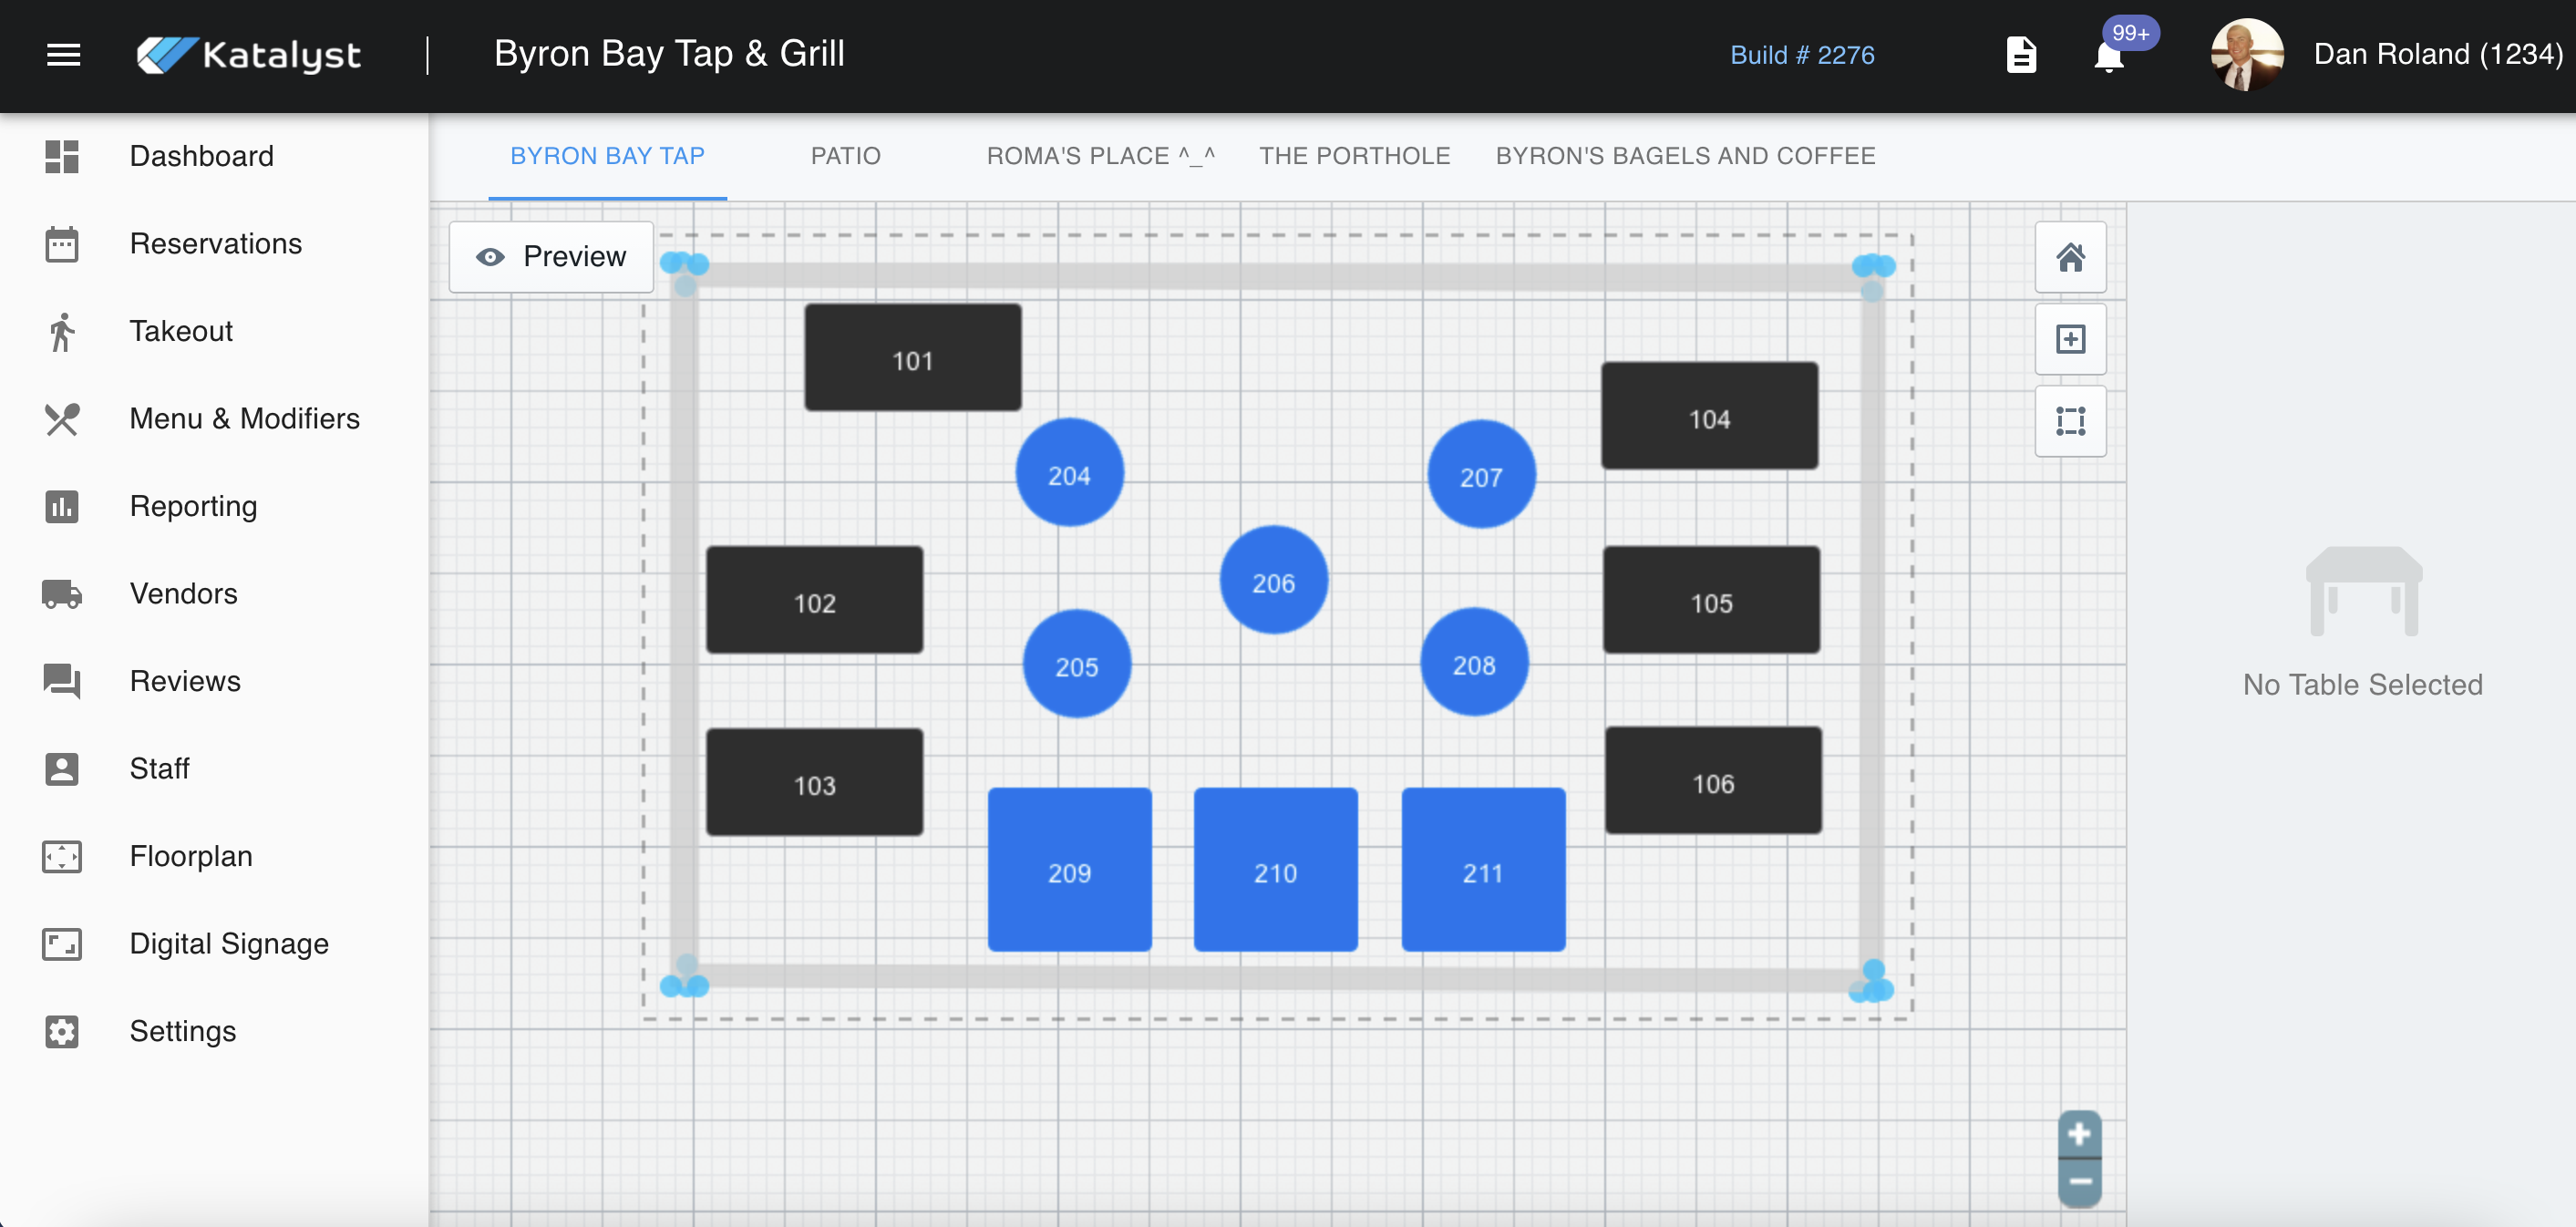
If you want to change the layout, you can go in and adjust this by clicking and dragging tables. You can also add walls and tables if your restaurant has undergone major changes. 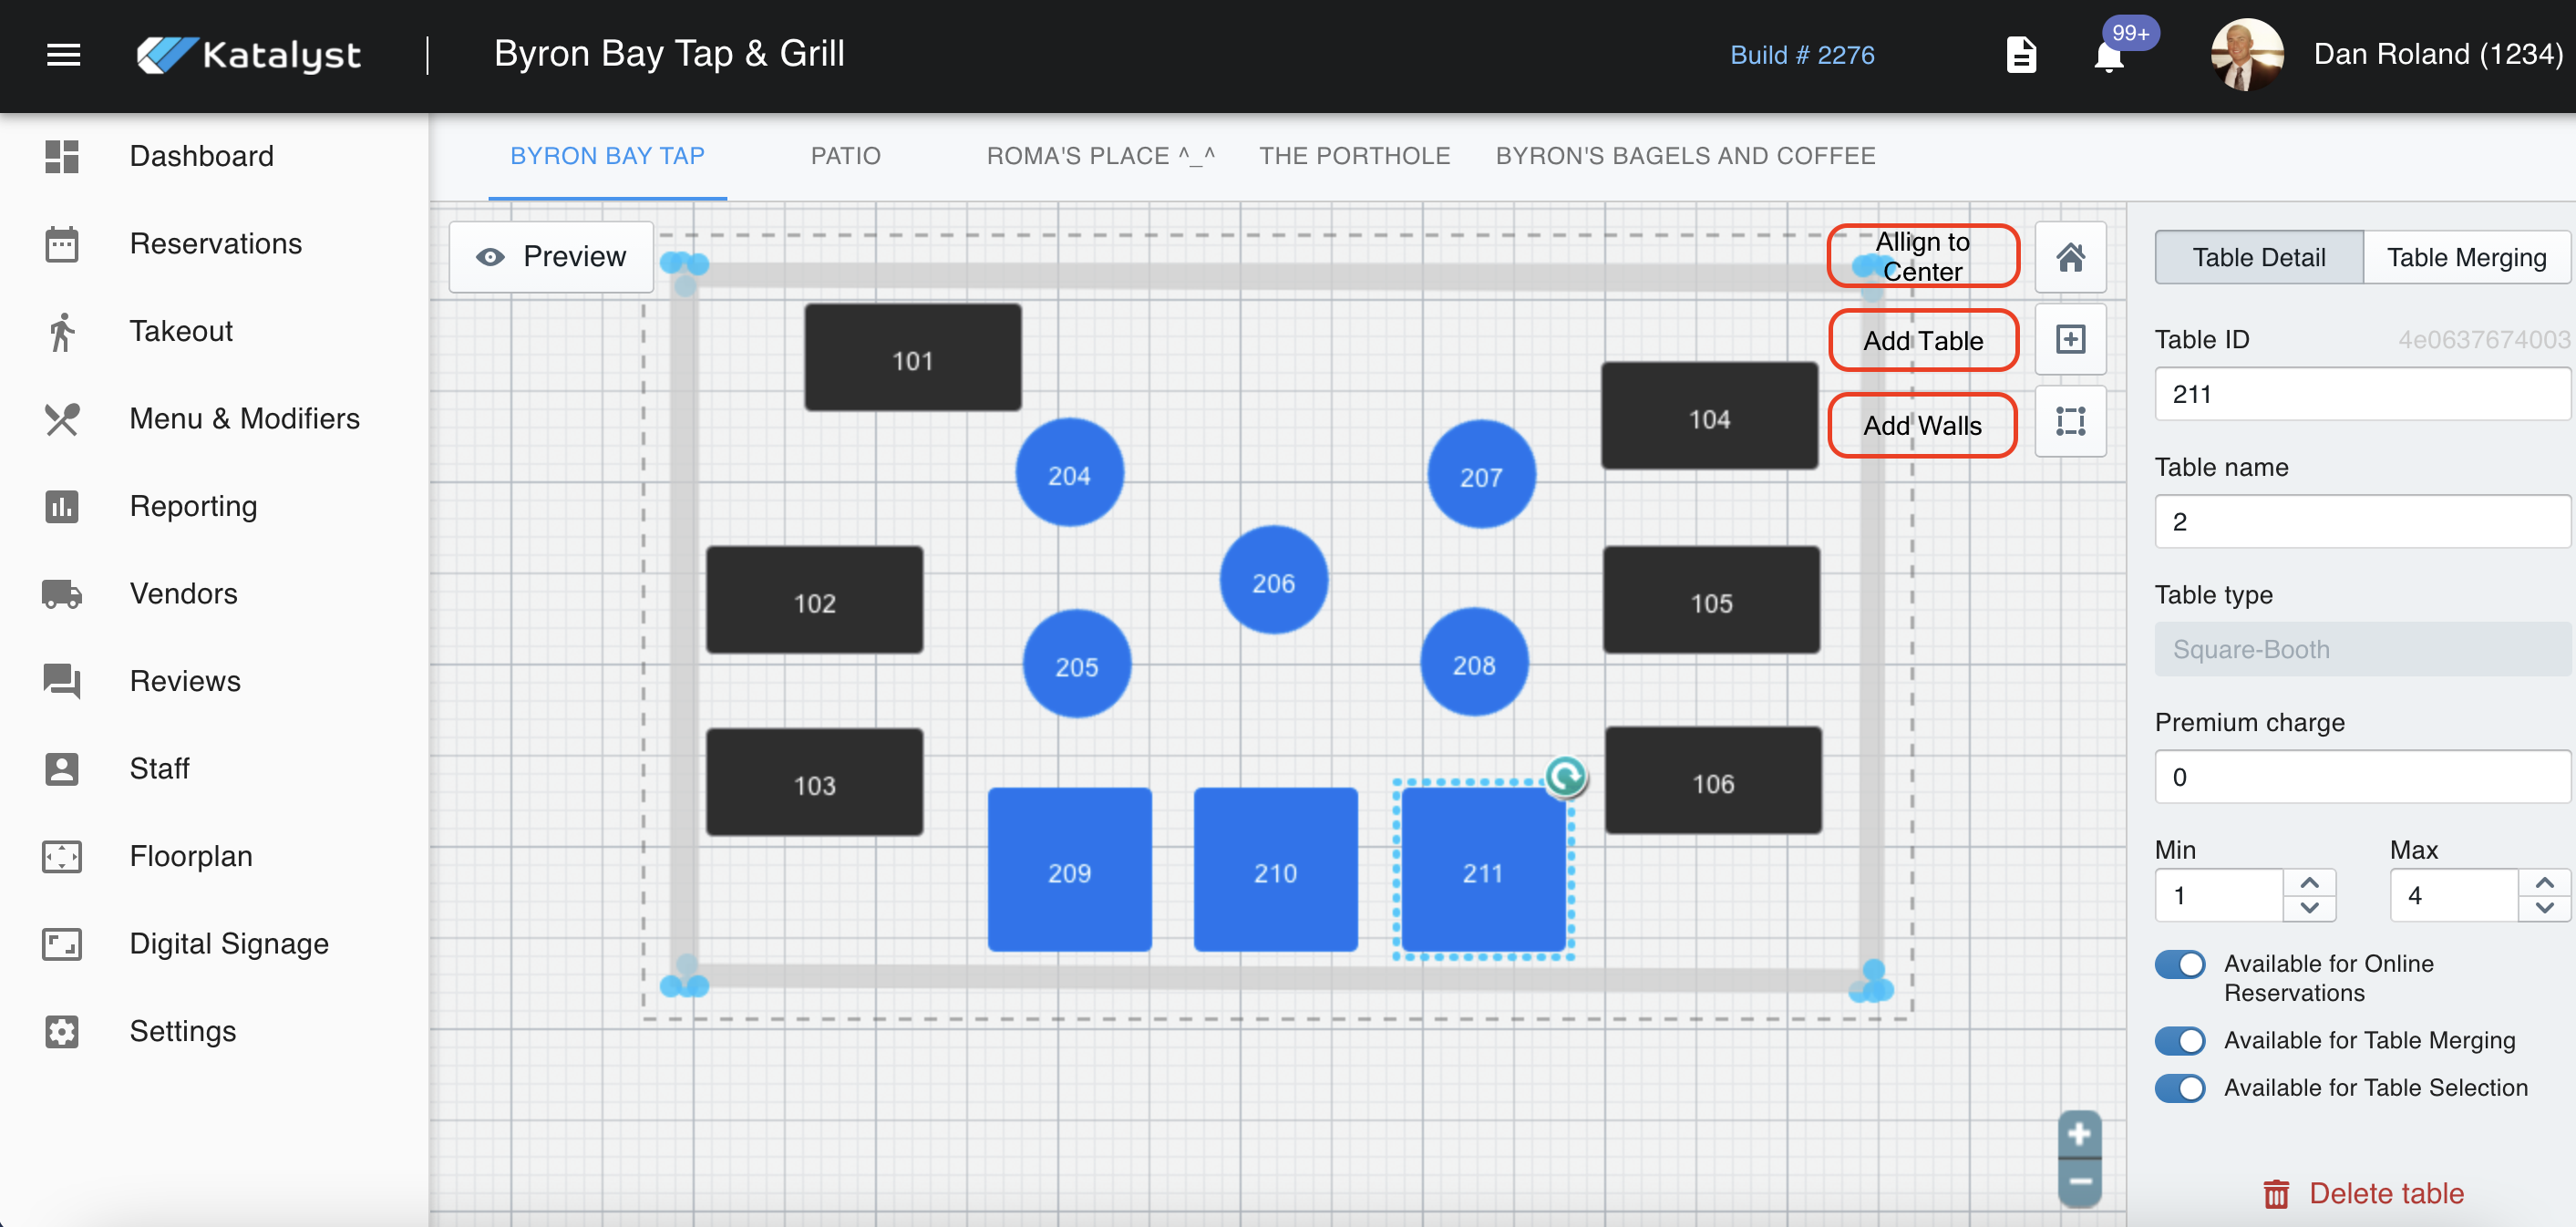
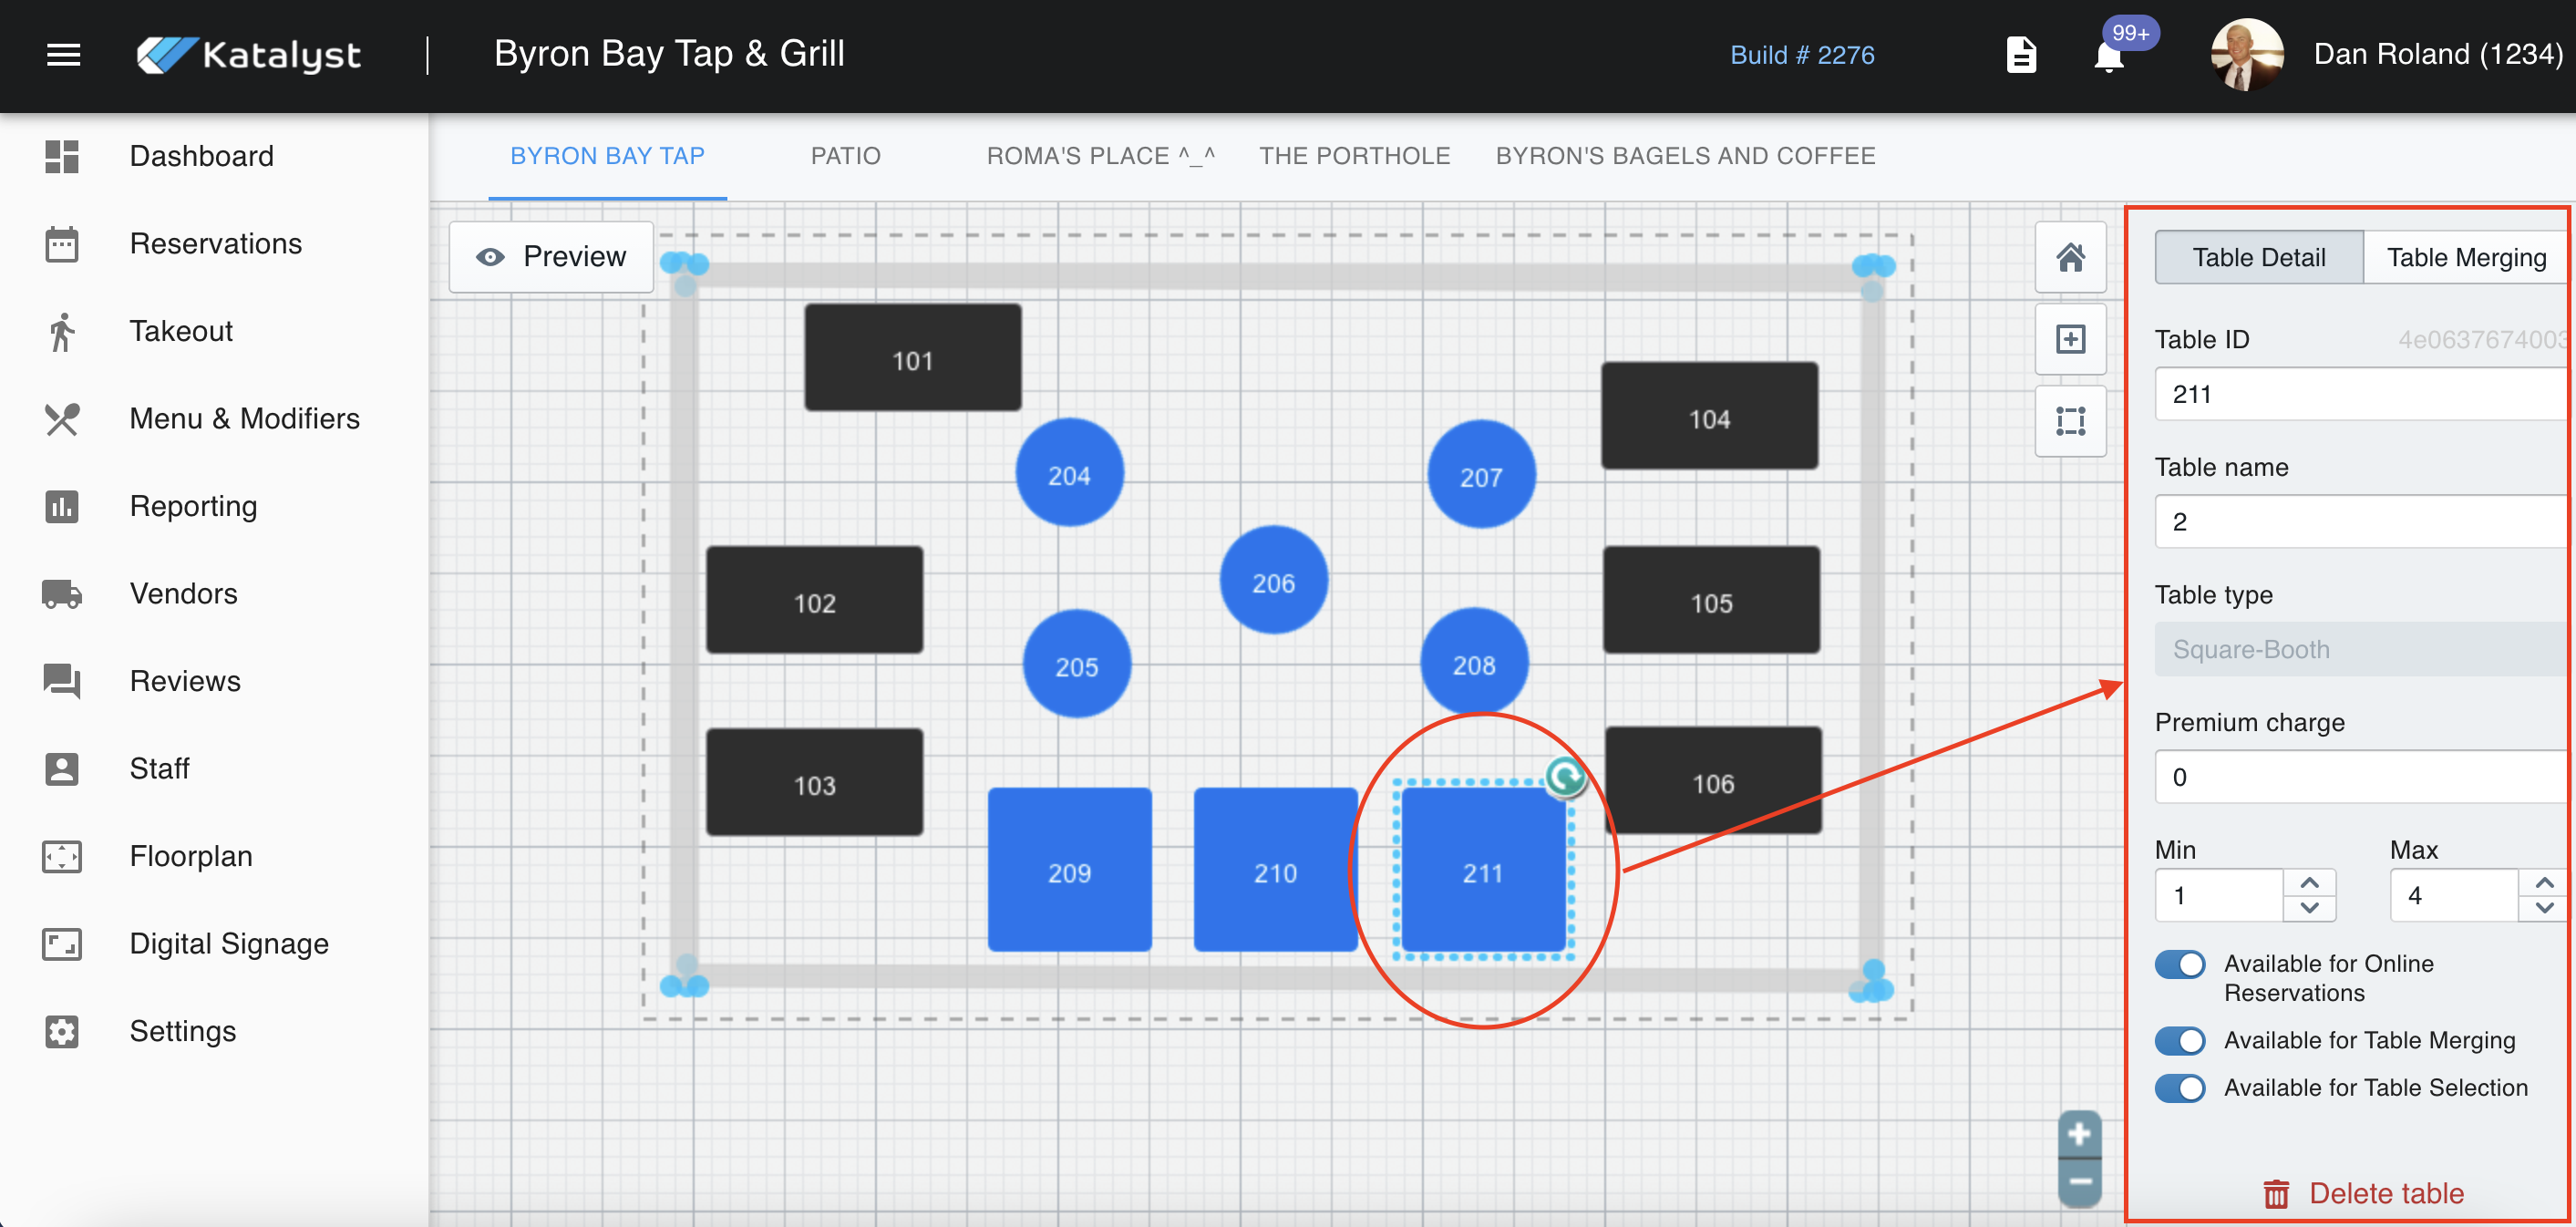
When you click on a table, a side screen will populate to the right. There are some capabilities to note starting with the basic table ID and Table name text boxes. You are not required to use these or may use just one or the other.
Premium charge allows for up-charges to more desirable tables. This is a great feature for venues with VIP sections like clubs and stage shows.
You can also pool tables that are available for online reservations. For example, say you only want to allow for half of your tables to appear available online. You can do so by switching on the toggle for "Available for Online Reservations" on tables of your choice.
Table merging allows you to set up preferences for which tables can be combined for larger parties. Each table should be set up ahead of time with their min/max capacity. Then you will need to select the table that is available to be merged and toggle "available for table merging" on. Next, you will click from table detail into table merging. This is where you can either create your own merging options or review and edit options that are auto-generated by the system. Table merging will also take into account what combinations are not available due to other reservations.
Sometimes you may want to allow your customers to be able to select their preferred seats. By toggling on the "available for table selection" option they can do that.